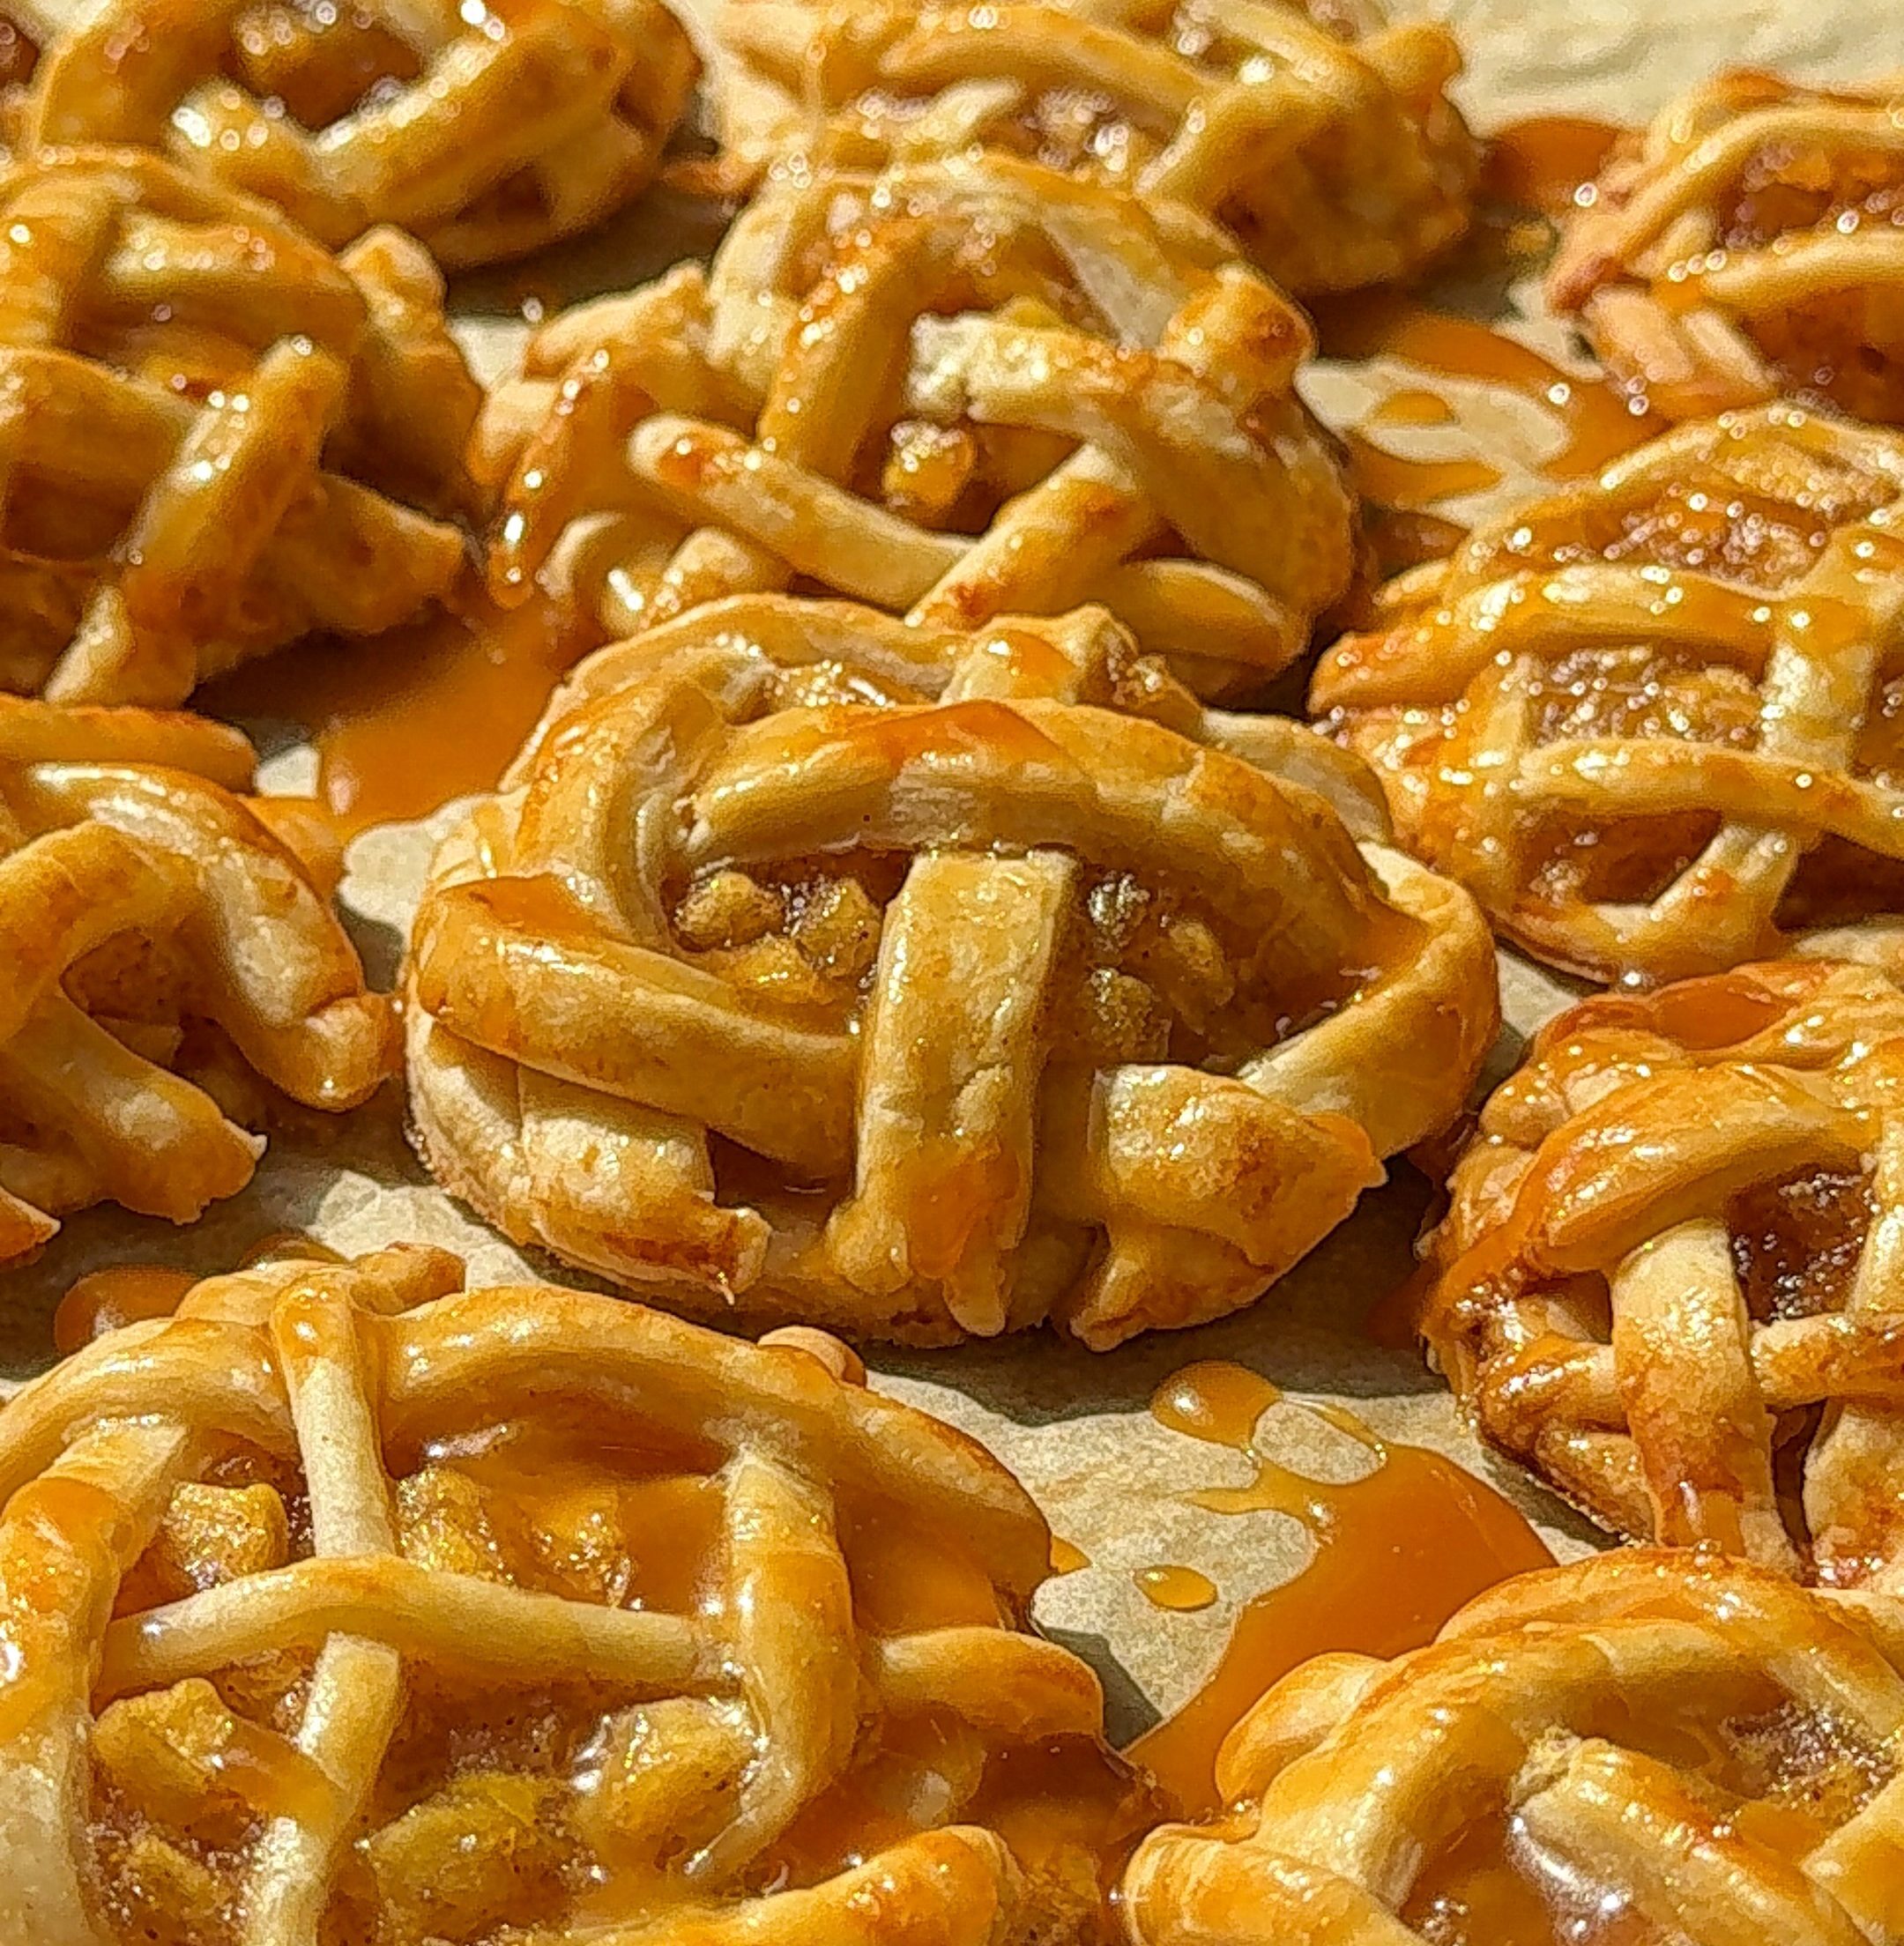
There’s just something magical about apple pie, but let’s be honest—sometimes making a full pie feels like a full-on project. That’s why I am obsessed with these Super Easy Apple Hand Pies. They’ve got all the cozy, cinnamon-apple goodness of a classic pie, but in adorable handheld form (read: easier to share, easier to eat, and way easier to make). With a shortcut of store-bought pie dough, a quick stovetop apple filling, and the ultimate finishing touch—a brown butter glaze—these little pies are the definition of comfort food meets convenience. Trust me, these will be the first dessert to disappear at any gathering.

Ingredients:
Apples – The star of the show! They provide natural sweetness and juiciness. Use a mix of tart and sweet varieties (like Granny Smith + Honeycrisp) for balance.
Butter – Adds richness and depth of flavor to the filling, plus it helps soften the apples as they cook.
Brown Sugar – Gives the filling a deep, caramel-like sweetness that pairs beautifully with apples.
Cinnamon – The cozy, warm spice that screams fall. It enhances the apple flavor and makes the filling taste like classic apple pie.
Lemon Juice – Brightens the filling, balances sweetness, and keeps the apples from browning too quickly.
Water + Cornstarch – These work together to thicken the filling so it doesn’t seep out of the pies during baking.
Store-Bought Pie Dough – The ultimate shortcut! Flaky, buttery, and saves loads of time.
Egg Wash – Ensures the pies bake up golden brown and slightly glossy.
Brown Butter – Nutty, toasty, and rich—it elevates the glaze from simple to spectacular.
Vanilla Extract – Adds warm sweetness and rounds out the flavors.
Powdered Sugar – Creates the smooth, sweet base of the glaze.
Cinnamon (in glaze) – Ties the whole dessert together with another hit of spice.
Why You’ll Love This Recipe
-
Easier than pie – No rolling, crimping, or stressing.
-
Handheld treats – Perfect for parties, holidays, or cozy snacking.
-
Shortcut-friendly – Store-bought dough makes them totally doable on a weeknight.
-
That glaze though – Brown butter glaze = chef’s kiss.
Equipment Needed
-
Medium Skillet – For cooking down the apple filling.
-
Mixing Bowl – To whisk together the glaze.
-
Baking Sheet – For baking the hand pies evenly.
-
Parchment Paper– Keeps the pies from sticking and makes cleanup easy.
-
Mason Jar Lid or Round Cutter – For cutting dough into circles.
-
Pastry Brush – To apply the egg wash.
Substitutions & Modifications
-
Apples – Try pears, peaches, or even mixed berries for a twist.
-
Brown Sugar – Use coconut sugar or granulated sugar in a pinch.
-
Pie Dough – Swap with puff pastry for extra flaky hand pies.
-
Glaze – Leave it off for a less-sweet version or swap for a simple dusting of powdered sugar.
-
Spices – Add nutmeg, allspice, or cardamom for extra warmth.
Super Easy Apple Hand Pies with Brown Butter Glaze (Made with Store-Bought Dough!)
Ingredients
Apple Pie Filling
- 2-3 apples peeled and diced
- 2 tbsp butter
- ¼ c brown sugar
- 1 tbsp cinnamon
- Juice of one lemon
- 1 tbsp water
- ½ tbsp cornstarch
Assembly
- Store-bought pie dough
- 1 egg for egg wash
Brown Butter Glaze
- ¼ c butter
- 1 tsp vanilla extract
- 1 c powdered sugar
- ½ tsp cinnamon
Instructions
Make the Apple Pie Filling
- In a skillet over medium heat, melt 2 tbsp butter.
- Add diced apples and sauté for 5 minutes until slightly softened.
- Stir in brown sugar, cinnamon, lemon juice, and water. Simmer for 5 minutes.
- Add cornstarch and stir until the filling thickens, about 5 more minutes. Remove from heat and cool slightly.
Assemble the Hand Pies
- Preheat oven to 350°F (175°C). Line a baking sheet with parchment paper.
- Roll out the store-bought pie dough and cut circles using a mason jar lid or cutter.
- Place a spoonful of apple filling in the center of each circle.
- Roll scraps and cut strips for lattice tops, or place another circle on top and crimp edges with a fork.
- Brush with egg wash.
- Bake for 30–35 minutes, until golden brown.
Make the Brown Butter Glaze
- In a small saucepan, melt butter over medium heat. Cook until golden brown and nutty, about 5 minutes.
- Remove from heat and whisk in vanilla, powdered sugar, and cinnamon until smooth.
- Drizzle over cooled pies.
Video
Nutrition
Tips & Tricks
-
Let the filling cool before assembling so it doesn’t make the dough soggy.
-
Don’t overfill the pies—1 tbsp filling is enough per circle.
-
If edges don’t stick, dip your finger in water and seal before crimping.
-
For extra crunch, sprinkle coarse sugar on top before baking.
Frequently Asked Questions
Can I make these ahead of time?
Yes! Assemble the pies and refrigerate unbaked for up to 24 hours before baking.
Can I freeze them?
Absolutely. Freeze unbaked pies on a baking sheet, then transfer to a freezer bag. Bake straight from frozen—just add 5–10 minutes to baking time.
Do I have to make the glaze?
Nope! They’re still delicious without it, but the glaze definitely makes them next-level.
Storage Instructions
-
Room Temp: Store in an airtight container for up to 2 days.
-
Fridge: Keep for 4–5 days.
-
Reheat: Warm in a 300°F oven for 5–7 minutes. Microwave for 20 seconds if you’re in a rush.
-
Freezer: Freeze baked pies for up to 2 months. Thaw overnight and reheat before serving.
More of my recipes
Do you LOVE Fall Recipes?! Check Out MORE of my Favs:Apple Crisp Latte with Homemade Apple Syrup (Better Than Starbucks!) Salted Caramel Apple Crumble Buns – Fluffy Bakery-Style Buns with Custard & Apple Pie Filling Brown Butter Pumpkin Cinnamon Rolls with Maple Cream Cheese FrostingConclusion
And there you have it—Super Easy Apple Hand Pies that deliver big apple pie flavor without the big apple pie fuss. They’re flaky, sweet, spiced, and topped with that dreamy brown butter glaze you’ll want to drizzle on everything. Perfect for holidays, bake sales, or just a cozy night in.
If you make these, I’d love to see your creations! Tag me on Instagram @munchiesbymallory and check out more of my cozy fall desserts on the blog. 🍎🥧✨


Leave a Reply Cancel reply