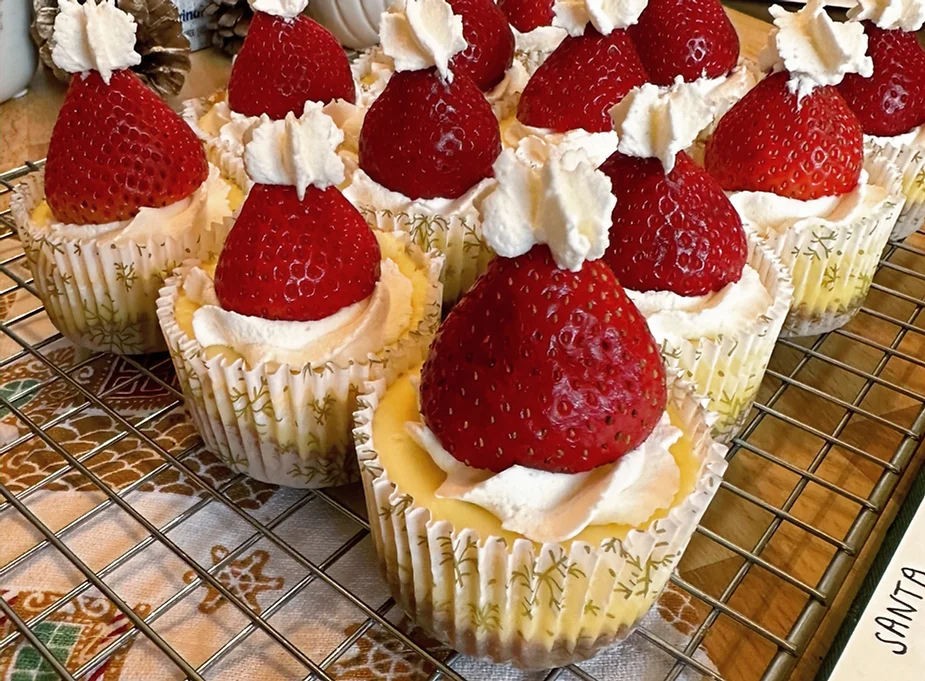
Mini Santa Hat Strawberry Cheesecakes – Festive Christmas Treats with White Chocolate & Graham Cracker Crust!
The cutest holiday treat!
Print Recipe
Pin
Servings: 12 mini cheesecakes
Calories: 180kcal
Video
Ingredients
Graham Cracker Crust
- 8 full sheets graham crackers
- 3 tablespoons melted butter
- 1 tablespoon granulated sugar
Cheesecake Filling
- 12 ounces cream cheese, stened to room temperature
- ⅓ cup granulated sugar
- ½ cup white chocolate chips, melted and cooled
- ¼ cup sour cream
- 1 tablespoon pure vanilla extract
- 2 large eggs
Whipped Topping
- ½ cup heavy whipping cream
- 2 tablespoons powdered sugar
Topping
- 1 pint fresh strawberries, washed and hulled
Instructions
- Preheat your oven to 325°F (163°C). Line a 12-cup muffin tin with cupcake liners for easy removal and presentation.
- Place the graham crackers in a food processor and pulse until they’re broken down into fine crumbs. If you don’t have a food processor, place the graham crackers in a zip-top bag and crush them with a rolling pin.
- Transfer the graham cracker crumbs to a bowl and stir in the melted butter and granulated sugar. Mix until all the crumbs are coated and the mixture resembles wet sand.
- Scoop about 1 tablespoon of the crust mixture into each cupcake liner, pressing down firmly with the back of a spoon to create an even layer.
- Bake the crusts for 5 minutes, allowing them to set. Remove from the oven and let them cool slightly while you prepare the filling.
- Step 2: Make the Cheesecake Filling
- In the bowl of a stand mixer fitted with the paddle attachment, beat the cream cheese on medium speed until smooth and creamy, about 2 minutes.
- Add the granulated sugar and continue to beat until fully combined and smooth, scraping down the sides of the bowl as needed.
- Gradually add the melted and cooled white chocolate chips, mixing on low speed until incorporated. Be sure the chocolate has cooled to prevent it from clumping when mixed with the cold ingredients.
- Add the sour cream and vanilla extract, and continue to mix until the filling is smooth and evenly combined.
- Crack in the eggs one at a time, mixing on low speed just until each egg is incorporated. Be careful not to overmix, as this can cause air bubbles that may lead to cracking.
- Step 3: Assemble and Bake
- Divide the cheesecake filling evenly among the muffin cups, spooning it over the graham cracker crusts until each is about three-quarters full.
- Bake the cheesecakes at 325°F (163°C) for 15-18 minutes. You’ll know they’re ready when the centers are just slightly jiggly; they’ll firm up as they cool.
- Remove the cheesecakes from the oven and let them cool in the muffin tin for 20 minutes before transferring them to the refrigerator. Chill for at least 2-3 hours to allow the flavors to meld and the texture to set.
- Step 4: Prepare the Whipped Topping
- In a chilled mixing bowl, pour in the heavy whipping cream. Using a hand mixer or stand mixer with the whisk attachment, beat the cream on medium-high speed.
- As the cream thickens, add the powdered sugar and continue to whip until soft peaks form. Soft peaks should hold their shape but fall slightly when the whisk is lifted.
- Transfer the whipped cream to a piping bag fitted with a star tip or any tip you like for easy, decorative swirls.
- Step 5: Garnish and Serve
- Once the cheesecakes are fully chilled, pipe a swirl of whipped cream on each mini cheesecake.
- Top each with a fresh strawberry for a burst of color and sweetness. For an extra touch, you can add a light dusting of graham cracker crumbs over the whipped cream.
- Serve chilled and enjoy these creamy, delightful mini santa hat strawberry cheesecakes!
- These mini santa hat strawberry cheesecakes are perfect for any occasion, offering a creamy filling, crunchy crust, and refreshing berry on top. You can store leftovers (if there are any!) in an airtight container in the refrigerator for up to 3 days.
Nutrition
Serving: 12g | Calories: 180kcal | Carbohydrates: 16g | Protein: 3g | Fat: 12g