
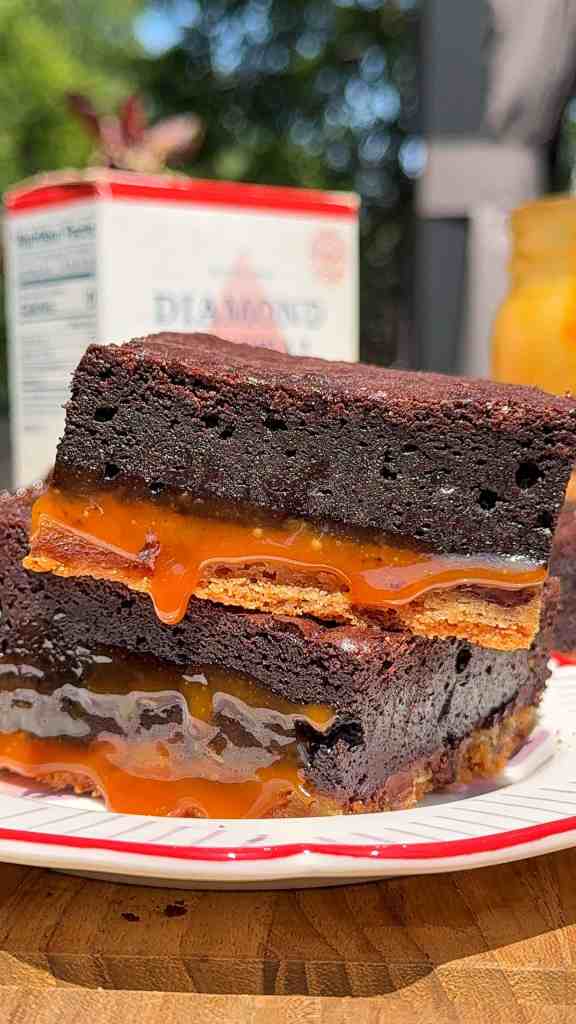
These brookies are straight-up outrageous—in the best way. Three epic layers: a chewy brown butter cookie base, a buttery rich brownie top, and a sticky, salty homemade caramel layer sandwiched in between. Like, are you kidding?! Every layer is totally worth making from scratch. But hey, if you want to use boxed brownie mix, store-bought cookie dough, or jarred caramel? No judgment here. I tested it all. But when you do the whole thing from scratch—with brown butter in both layers—it is next-level bakery-style. Trust me, it’s giving “fancy dessert bar at a wedding,” but without all the fuss.
Ingredients:
-
Light Brown Sugar: Adds moisture and a subtle molasses flavor to both the brownie and cookie layers. Essential for that chewy texture and golden flavor.
-
Granulated Sugar: Used in all three layers to balance out the deep richness of brown sugar and cocoa.
-
Unsalted Butter: We brown it for a toasty, nutty flavor that really shines in layered desserts. Use unsalted so you can control the salt levels.
-
Eggs: Provide structure and richness. In the brownie layer, they also contribute to that signature fudgy texture.
-
Cocoa Powder: The heart of the brownie layer. It brings intense chocolate flavor without added sweetness.
-
Vanilla Extract: Adds warmth and balances all the sweet notes.
-
Salt: Enhances flavor and tempers the sweetness. Especially key in the caramel.
-
All-Purpose Flour: Gives body to the brownie and cookie dough.
-
Baking Powder: Gives the cookie layer a bit of lift so it doesn’t bake up too dense.
-
Cornstarch: Makes the cookie layer extra soft and chewy.
-
Semi-Sweet Chocolate Chips: Because… chocolate. They melt into gooey pockets in the cookie layer.
-
Heavy Cream: Key in making silky, pourable caramel.
Why You’ll Love This Recipe:
-
Three Layers of Dessert Heaven – Each bite is a gooey, salty-sweet chocolate explosion.
-
Brown Butter Magic – Adds a nutty depth that makes this way more than your average brookie.
-
Make-Ahead Friendly – Even better the next day. Actually, they cut better and taste richer.
-
Customizable – Use store-bought shortcuts if you need to, or bake everything from scratch when you’re feeling it.
-
Perfect for Parties – Cut into 16 squares for indulgent treats or 36 mini bites for events like weddings or showers.
What is a brookie?
A brookie is a delightful dessert that combines two classic treats: brownies and cookies. It typically consists of a layer of cookie dough on the bottom, topped with a layer of brownie batter. When baked together, the cookie dough and brownie layers meld into a deliciously rich and indulgent treat with a perfect blend of chewy cookie and fudgy brownie textures. The combination of flavors and textures makes brookies a favorite among dessert lovers, offering the best of both worlds in a single delightful bite.
Equipment Needed
Saucepan – Essential for making both the brown butter and caramel; it gives you control over heat and browning.
Whisk – Helps emulsify the caramel and ensures a smooth brownie batter.
Rubber Spatula – Perfect for folding in ingredients gently and scraping every bit of batter or dough.
Mixing Bowls – You’ll need at least two: one for the cookie dough and one for the brownie batter.
9×9 Baking Pan – The ideal size for thick, layered brookies that bake evenly.
Parchment Paper – Makes for easy removal and extra clean-up points (plus helps prevent sticking).
Measuring Cups & Spoons – Accuracy is key in baking, especially with homemade caramel.
Sharp Knife – A must for clean, beautiful slices—bonus points if you chill the brookies first.
Substitutions & Modifications for my Salted Caramel Brookies:
-
Store-bought swaps: Don’t feel like making it all? Use:
-
Brownie mix
-
Chocolate chip cookie dough
-
Jarred caramel sauce
-
-
Gluten-Free: Sub with a 1:1 GF flour blend.
-
Dairy-Free: Use vegan butter and coconut cream in place of heavy cream.
-
Egg-Free: Try flax eggs (1 tbsp flaxseed + 2.5 tbsp water per egg) for the cookie layer. Brownie may need more experimentation.
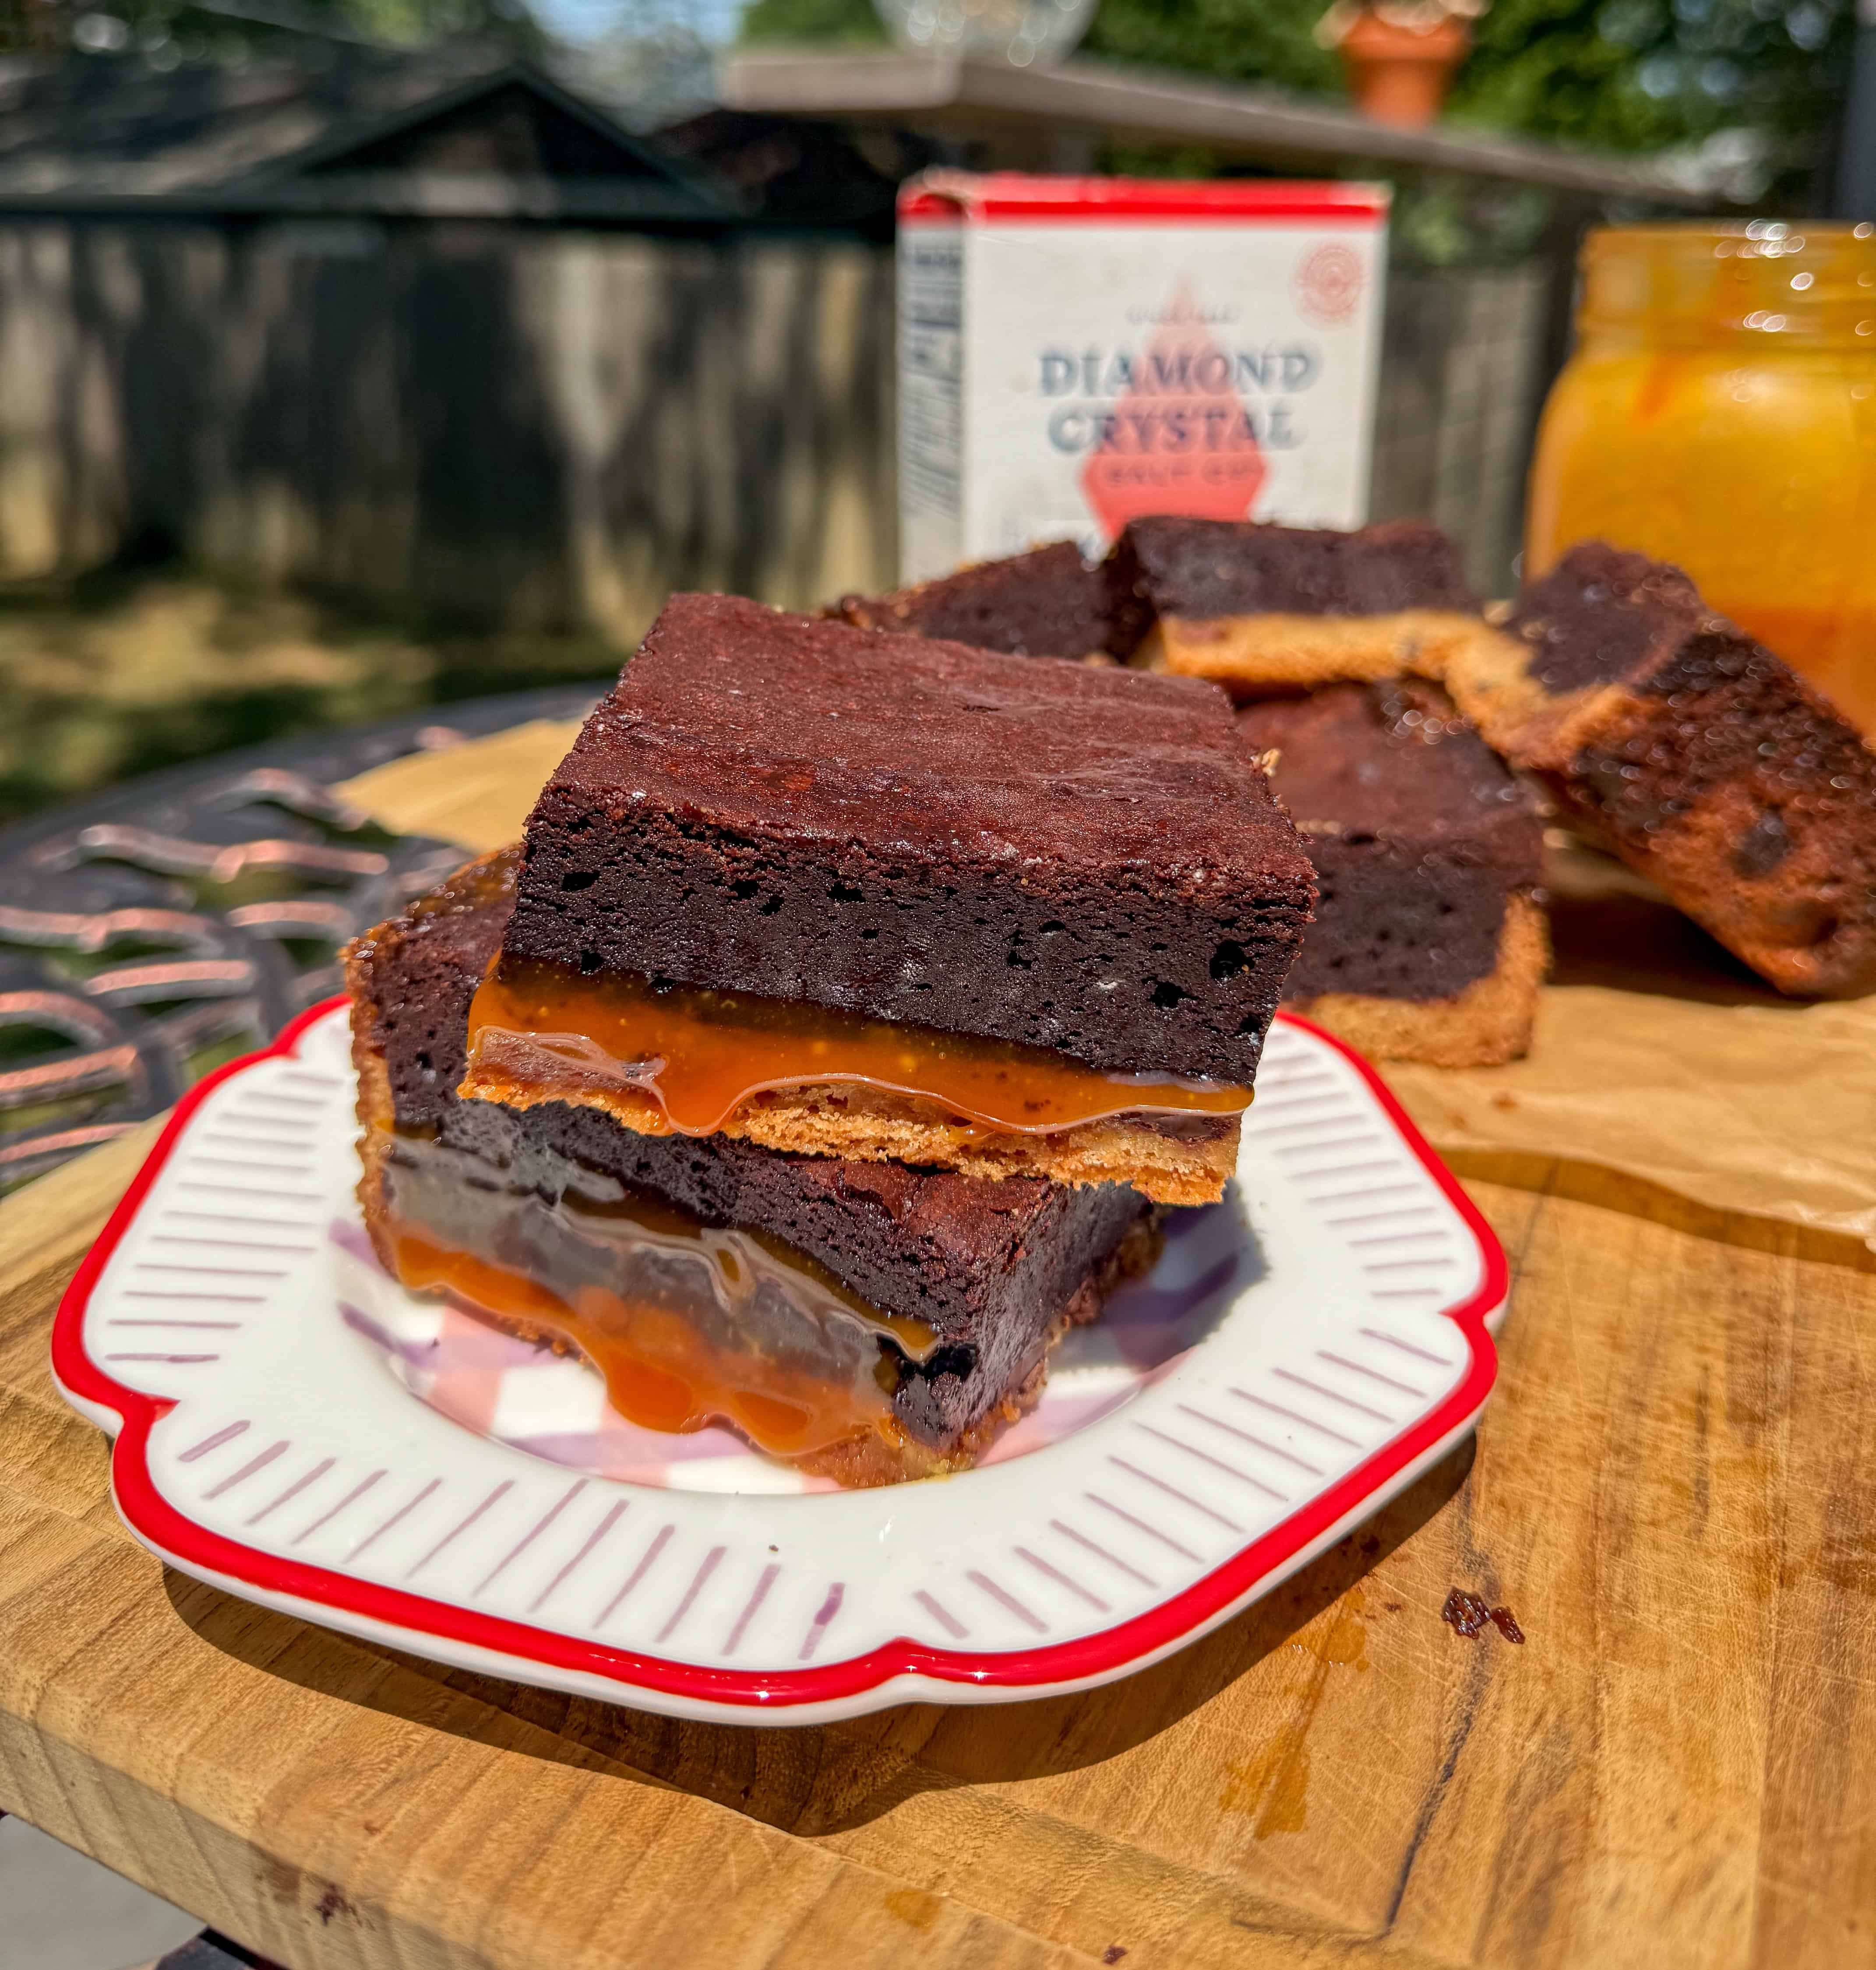
Brown Butter Salted Caramel Brookies – The Ultimate Triple-Layer Dessert
Video
Ingredients
Brownie Layer
- 1 ½ cups light brown sugar
- 1 cup granulated sugar
- 1 ¼ cups unsalted butter
- 4 large eggs
- 1 ½ cups cocoa powder
- 2 tsp vanilla extract
- ¼ tsp salt
- ⅔ cup all-purpose flour
Cookie Layer
- ½ cup unsalted butter
- ½ cup light brown sugar
- ¼ cup granulated sugar
- 1 large egg
- 1 tsp vanilla extract
- 1 cup all-purpose flour
- ½ tsp baking powder
- ¼ tsp salt
- ¼ tsp cornstarch
- 1 cup semi-sweet chocolate chips
Salted Caramel Layer
- ½ cup granulated sugar
- 3 tbsp unsalted butter room temp, cubed
- ¼ cup heavy cream
- ½ tsp salt
Instructions
1. Make the Salted Caramel
- Start by making your caramel so it has time to cool and thicken slightly before layering.
- In a medium saucepan, add 1/2 cup of granulated sugar and heat over medium heat. Stir constantly using a heatproof spatula or wooden spoon.
- The sugar will first clump, then begin to melt—don’t panic, just keep stirring. Around the 6–8 minute mark, it should fully melt into a deep amber-colored liquid.
- As soon as it’s smooth, remove the pan from heat and carefully add 3 tablespoons of room-temp cubed butter. The mixture will foam and bubble aggressively—this is normal!
- Stir until fully incorporated and smooth, then slowly pour in 1/4 cup of heavy cream, whisking as you go. Finish with 1/2 teaspoon of salt, stir, and transfer to a mason jar or heatproof container.
- Let the caramel cool and firm up at room temp while you make the rest. (It will thicken as it cools, which is exactly what you want for clean layering.)
- Shortcut Tip: You can absolutely use your favorite jarred caramel sauce if you’re short on time. I recommend one with sea salt!
2. Brown the Butter
- In a medium saucepan, melt 2 cups (4 sticks) of unsalted butter over medium heat.
- Once melted, stir frequently. The butter will foam, then pop, then eventually develop brown bits at the bottom and smell toasty and nutty.
- This takes about 7–10 minutes. As soon as it turns a rich amber color, remove from heat.
- Pour it into a heatproof bowl (scraping in all the flavorful browned bits!) and allow it to cool for 10–15 minutes.
- Note: After browning, you’ll end up with about 1¾ cups of butter—perfect for splitting between your cookie and brownie layers.
3. Make the Cookie Dough Layer
- In a medium mixing bowl, combine ½ cup of the cooled brown butter with ½ cup light brown sugar and ¼ cup granulated sugar. Stir until fully combined and glossy.
- Mix in 1 large egg and 1 teaspoon vanilla extract until smooth.
- In a separate bowl, whisk together 1 cup all-purpose flour, ½ teaspoon baking powder, ¼ teaspoon salt, and ¼ teaspoon cornstarch.
- Fold the dry ingredients into the wet mixture using a spatula. Stir until just combined—don’t overmix.
- Fold in 1 cup of semi-sweet chocolate chips. Set aside at room temp (no need to chill).
- Shortcut Tip: Store-bought chocolate chip cookie dough totally works here in a pinch!
4. Make the Brownie Batter
- In a large mixing bowl, combine the remaining 1¼ cups of browned butter with 1½ cups light brown sugar and 1 cup granulated sugar. Whisk until smooth and shiny.
- Add 4 eggs, one at a time, mixing fully between each addition to help create that signature crinkly top.
- Stir in 2 teaspoons of vanilla extract.
- Sift in 1½ cups of cocoa powder, folding gently with a spatula until no streaks remain. Then add ⅔ cup all-purpose flour and ¼ teaspoon salt and fold again until just combined.
- Pro Tip: The batter will be thick and rich. Don’t overmix once the flour is in—this keeps the brownies tender and gooey.
5. Assemble the Brookies
- Preheat your oven to 350°F (175°C) and line a 9×9-inch square pan with parchment paper, leaving some overhang for easy lifting later.
- Press the cookie dough evenly into the bottom of the pan using your fingers or an offset spatula.
- Pour the cooled salted caramel over the cookie dough. Don’t go too close to the edges—this helps prevent burning or sticking.
- Gently spread the brownie batter on top. Use a spatula to smooth the surface.
- Layering Note: If your caramel is too runny, you can pop it in the fridge for 5–10 minutes before layering.
6. Bake
- Bake in the center of the oven for 45 to 55 minutes.
- The top should look set and slightly cracked, but a toothpick inserted in the center should come out with a few moist crumbs—no wet batter.
7. Cool and Slice
- Allow the brookies to cool in the pan at room temp for at least 1 hour. This helps the layers set.
- For ultra-clean edges and the perfect firm-but-chewy texture, refrigerate the brookies for at least 4 hours or (even better) overnight.
- Use a sharp knife to slice into 16 large squares or 36 small bites if serving a crowd or for an event.
- ️ Pro Tip: Wipe your knife clean between cuts for bakery-style slices!
Tips & Tricks
-
Don’t overbake! These are best when the center is still a bit gooey.
-
Use a metal pan for even baking.
-
Chill before slicing if you want clean edges.
-
Warm before serving for that gooey chocolate-caramel melt.
Storage Instructions
-
Store: In an airtight container at room temp for 3 days, or in the fridge for up to 1 week.
-
Freeze: Wrap individual pieces and freeze for up to 3 months. Thaw at room temp or warm in the microwave.
-
Reheat: Microwave for 10–15 seconds to get that gooey caramel back.
More of my recipes
Do you LOVE Brown Butter as Much as I do?!?! Check Out More of my Favs:The Best Brown Butter Chocolate Chip Banana Bread Recipe! (VIDEO Included) Brown Butter Tiramisu Brownies (Rich, Fudgy, and Caffeinated Bliss) Brown Butter Chocolate Chip Cookie Cheesecake Recipe
Conclusion
These Brown Butter Salted Caramel Brookies are the definition of indulgent. Whether you go all-in and make every layer from scratch (highly recommend), or you shortcut with some store-bought help, they’ll still be showstoppers. Make them for parties, girls’ nights, or just to treat yourself midweek—you deserve it.
If you loved this recipe, share it, tag me on Instagram @munchiesbymallory, and don’t forget to leave a review! Want more indulgent brown butter recipes? Check out my Brown Butter Tiramisu Brownies or my classic Banana Bread Cinnamon Rolls. 💛




Leave a Reply