I just combined my two favorite desserts… and I’m never looking back. Brownies have always had my heart—I’m a certified chocoholic through and through. But tiramisu? That’s my go-to restaurant dessert. It’s creamy, bold, sweet, and a little sultry, and it never misses. So naturally, I thought, why not mash up both? These brown butter tiramisu brownies are rich, fudgy, and full of bold espresso flavor, with a mascarpone whipped topping that’s honestly good enough to eat with a spoon. I’m on a huge tiramisu kick lately, so don’t be surprised if a full tiramisu recipe week is coming soon.

Ingredients:
Unsalted Butter – Browning the butter brings a rich, nutty, toffee-like flavor that deepens the taste of the chocolate and adds complexity to the base. It’s a small step with major payoff.
Light Brown Sugar – Adds moisture and chewiness, and the molasses gives the brownies a deeper caramel undertone.
Granulated Sugar – Balances the brown sugar and contributes to the crackly top we all love on a good brownie.
Eggs – These bind everything together, but they also help create that fudgy, dense texture. Room temp is key for even mixing.
Vanilla Extract – Rounds out the flavors and adds warmth. It’s subtle but noticeable.
Dutch-Processed Cocoa Powder – This is non-acidic, smooth, and deeply chocolatey. It makes the brownies rich and decadent. Sift it!
Fine Grain Salt – Brings balance and sharpens the sweetness. Just a pinch is all you need.
All-Purpose Flour – Minimal flour keeps these brownies dense and fudgy. Sift it to avoid dry clumps.
Ladyfingers – Classic tiramisu component. They soak up all the coffee flavor and become soft and cake-like.
Espresso or Coffee – Adds depth and boldness. The caffeine boost is just a perk.
Coffee Liqueur – Optional, but enhances that signature tiramisu flavor. Boozy, bittersweet, and delicious.
Mascarpone Cheese – Essential for the whipped topping. It’s rich, creamy, and slightly tangy.
Heavy Cream – Whips into a light, fluffy texture to mix with mascarpone and balance its richness.
Powdered Sugar – Sweetens the mascarpone layer and helps with structure.
Cocoa Powder (for dusting) – Adds a bitter-sweet finish and classic tiramisu flair.
Why You’ll Love This Recipe
-
The rich, nutty brown butter base takes brownies to a whole new level.
-
You get the chewiness of brownies + the creaminess of tiramisu in every bite.
-
It’s a show-stopping dessert that’s still surprisingly easy to make.
-
Perfect for coffee lovers, chocolate lovers, and everyone in between.
-
Make-ahead friendly and even better the next day.
What Is Tiramisu?
Tiramisu is a traditional Italian dessert made of espresso-soaked ladyfingers layered with a whipped mixture of mascarpone cheese, eggs (or whipped cream), and sugar. It’s rich, bold, creamy, and has a slight bitterness from cocoa powder and coffee. It literally means “pick me up,” which is fitting considering the espresso kick.
Equipment Needed for my Brown Butter Tiramisu Brownies:
-
9×9 inch baking pan – This size ensures thick, fudgy brownies with even baking and perfect layering.
-
Saucepan (for browning butter) – A light-colored saucepan lets you watch the butter closely as it browns so you don’t burn it.
-
Stand mixer or hand mixer – You’ll need the power to whip the mascarpone and cream into a light, fluffy topping.
-
Mixing bowls – Multiple bowls help keep your steps organized—from browning butter to mixing batter to whipping topping.
-
Sifter or fine mesh strainer – Sifting the cocoa and flour prevents lumps and creates a smooth, even batter.
-
Spatula – Perfect for scraping every bit of batter and spreading layers evenly without overmixing.
-
Measuring cups + spoons – Accuracy matters in baking—especially with ratios like butter, flour, and sugar.
Substitutions & Modifications
-
No espresso? Use strong brewed coffee or instant espresso dissolved in water.
-
No mascarpone? Try full-fat cream cheese, though it’ll be slightly tangier.
-
Want it alcohol-free? Omit the coffee liqueur or use a splash of vanilla.
-
Don’t have Dutch cocoa? Use regular unsweetened cocoa powder, but the flavor will be slightly less intense.

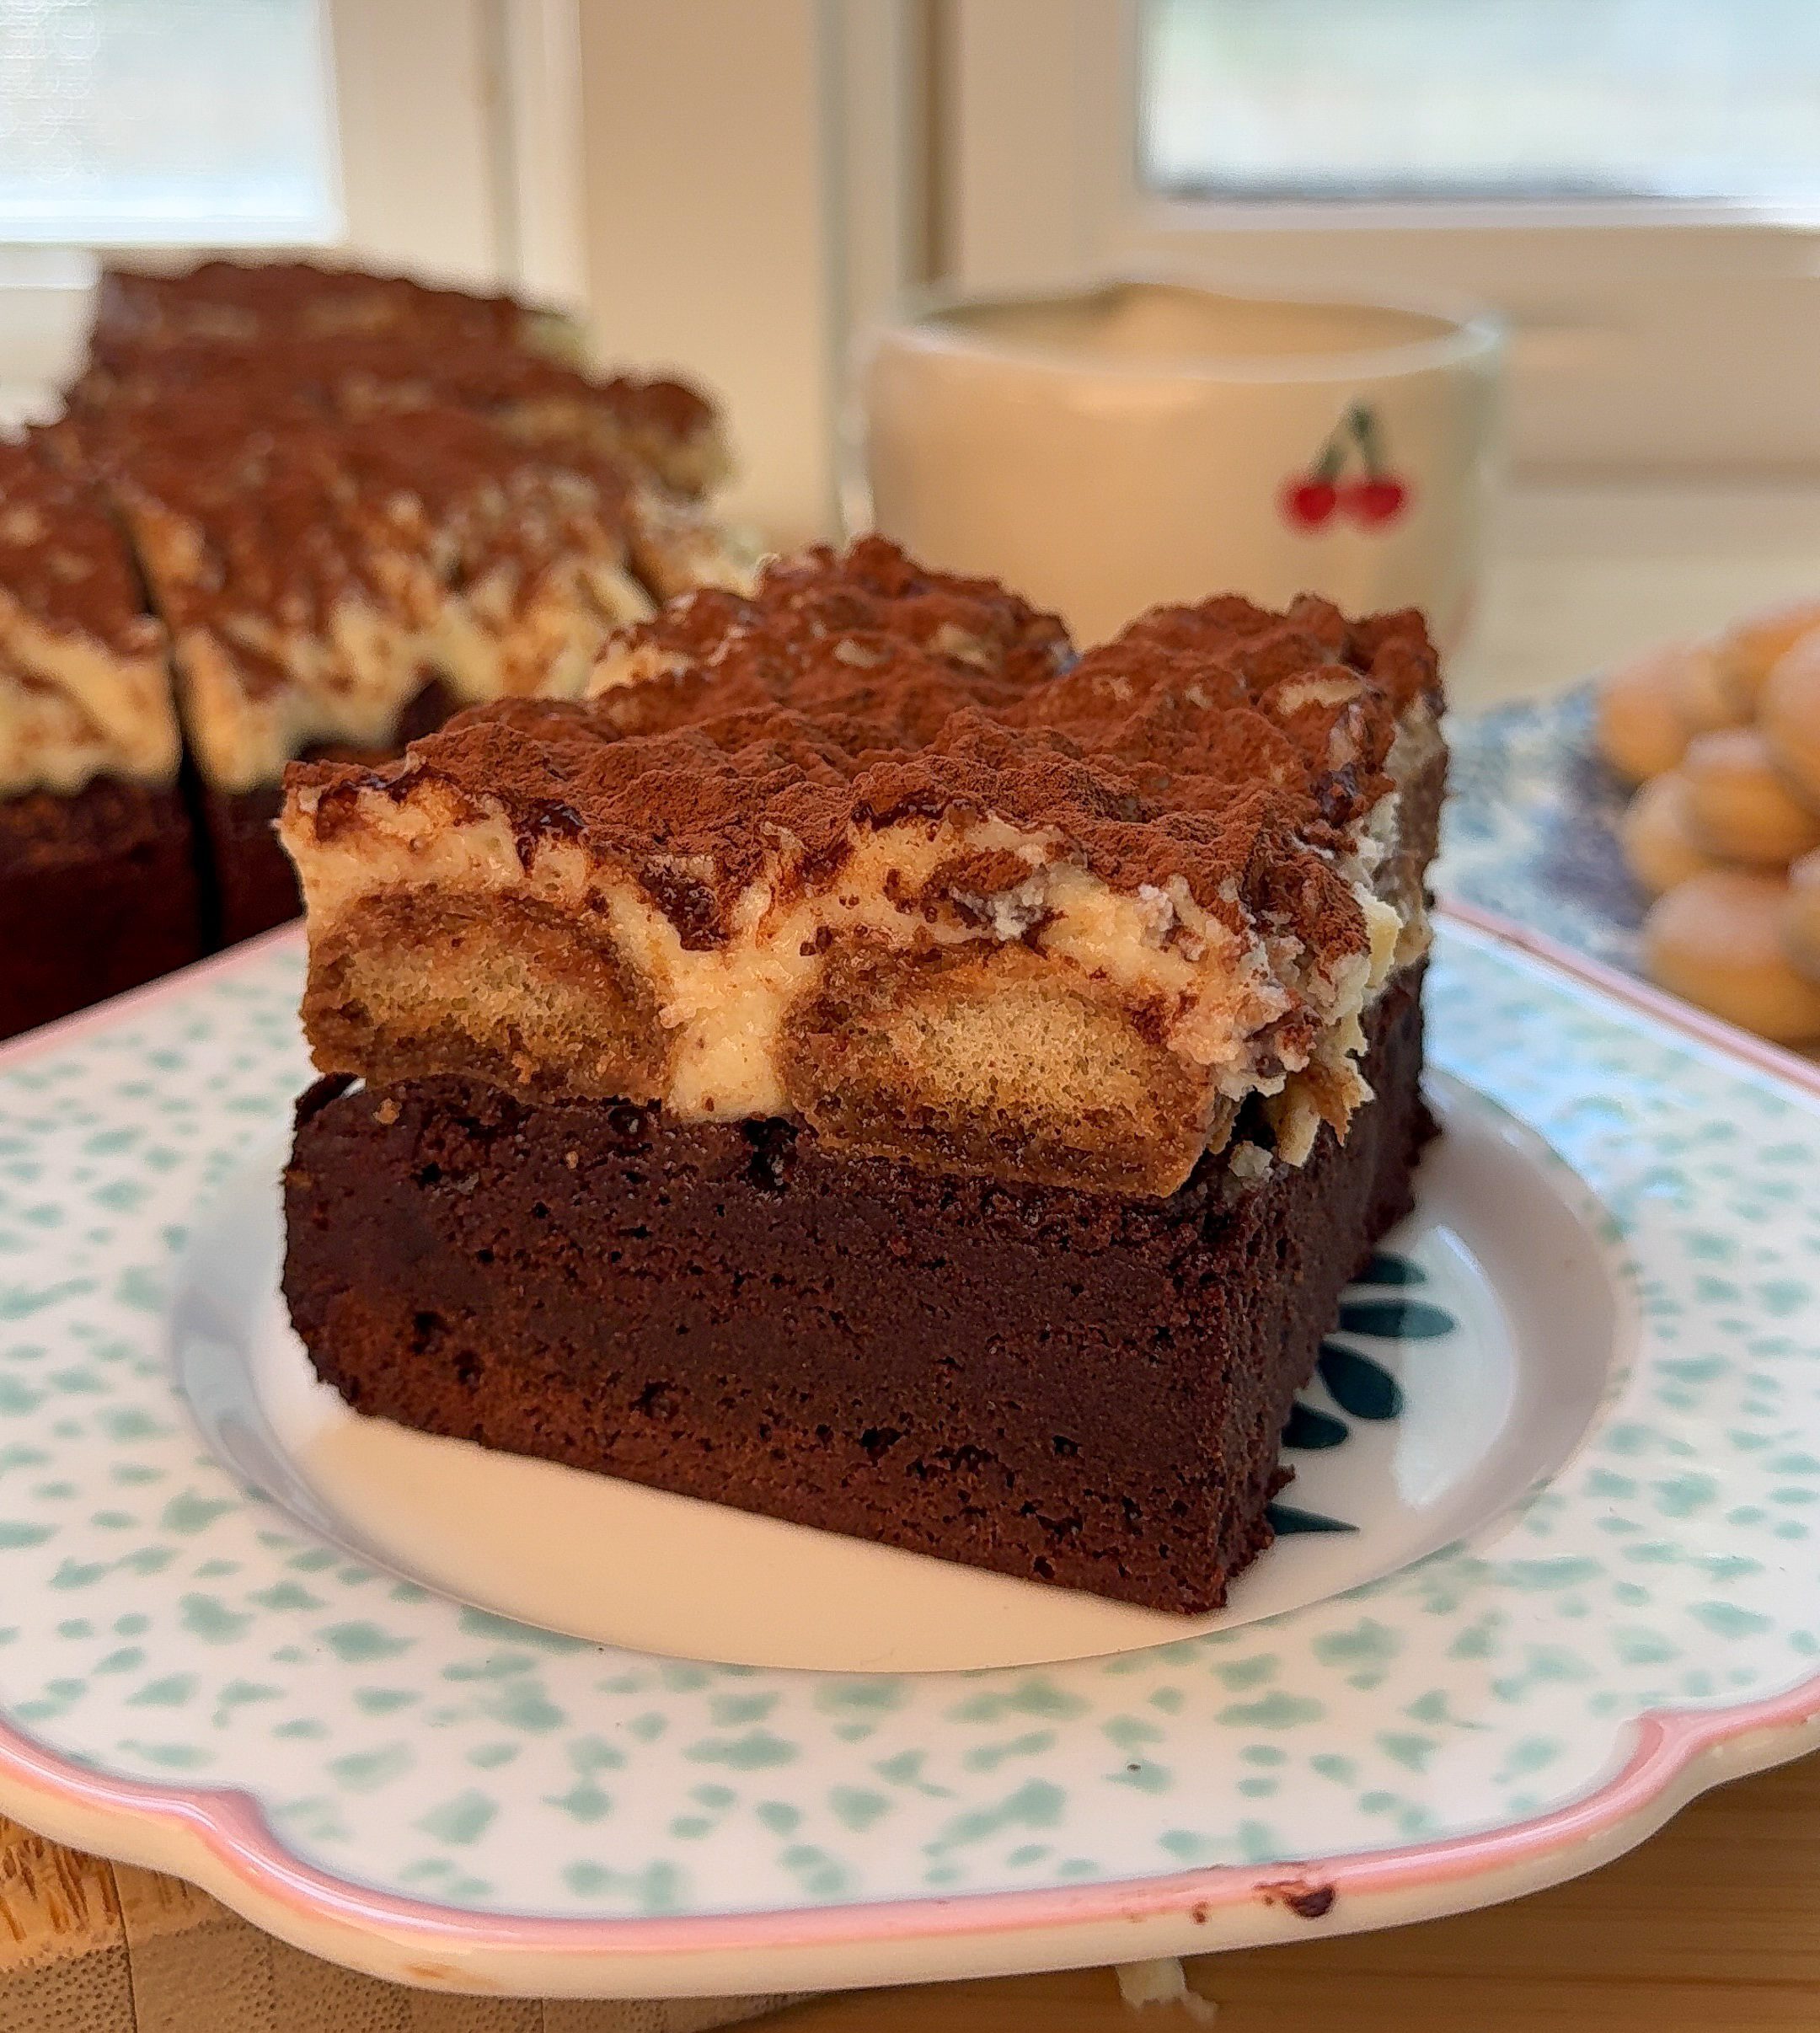
Brown Butter Tiramisu Brownies (Rich, Fudgy, and Caffeinated Bliss)
Ingredients
For the Brownie Base
- 1 ¼ cups unsalted butter
- 1 ½ cups light brown sugar
- 1 cup granulated sugar
- 4 large eggs, room temperature
- 1 tsp vanilla extract
- 1 ½ cups Dutch-processed cocoa powder sifted
- ¼ tsp fine grain salt
- ⅔ cup all-purpose flour sifted
For the Tiramisu Layer
- 10 –12 ladyfingers
- ½ cup freshly brewed espresso or strong cfee
- 1 tbsp cfee liqueur like Kahlúa or Tia Maria
- 8 oz mascarpone cheese
- 1 cup heavy cream
- ⅓ cup powdered sugar
- Cocoa powder for dusting
Instructions
Baking Instructions (Step-by-Step)
- Preheat oven to 350°F (175°C). Line a 9×9″ pan with parchment paper.
- In a saucepan, brown the butter over medium-low heat until nutty and golden (see above instructions). Let cool for 10 minutes.
- In a large bowl, whisk together the brown butter, brown sugar, and granulated sugar.
- Add eggs, one at a time, whisking fully after each addition. Stir in vanilla extract.
- Sift in the cocoa powder and mix until just combined.
- Sift in the flour and salt and gently fold together until smooth.
- Pour batter into prepared pan and spread evenly.
- Bake for 45–55 minutes or until a toothpick inserted comes out with moist crumbs.
- Let cool completely in the pan (about 1 hour).
Tiramisu Topping:
- In a shallow dish, mix espresso and coffee liqueur. Quickly dip each ladyfinger and layer across the cooled brownie surface.
- In a mixing bowl, beat the mascarpone and powdered sugar until smooth.
- Slowly stream in heavy cream and beat until light, fluffy, and spreadable.
- Spread over the ladyfingers evenly.
- Dust with cocoa powder and refrigerate for at least 4 hours or overnight.
- Slice into 16 squares and serve cold.
Video
Nutrition
Tips & Tricks
-
Always sift the cocoa powder and flour to avoid lumps—your future self will thank you.
-
Let the brown butter cool just enough before adding sugars to avoid cooking the eggs.
-
Chill the tiramisu brownies overnight for the best texture and flavor.
-
Use a warm knife (run it under hot water and dry it off) for clean slices.
-
Dust with cocoa powder right before serving so it doesn’t soak in.
Storage Instructions
-
Store covered in the fridge for up to 5 days.
-
Freezing: Slice and freeze in an airtight container for up to 2 months. Thaw overnight in the fridge before serving.
-
Reheating? Don’t do it! This one’s best chilled like a true tiramisu.
More of my recipes
Do you LOVE Tiramisu?! Check Out More of my Favs:Authentic Italian Tiramisu Recipe Small Batch Tiramisu Recipe – Beginner-Friendly & Perfect for TwoConclusion
These brown butter tiramisu brownies are exactly what happens when two soulmates (brownies + tiramisu) collide. You get richness, chewiness, creaminess, and a bold coffee kick all in one bite. Make these for a party, a dinner with friends, or just a Tuesday pick-me-up. They’ll impress every time.
👉 If you love this recipe, don’t forget to tag me @munchiesbymallory and let me know! And definitely stay tuned—this is just the beginning of #TiramisuWeek.


Leave a Reply Cancel reply