
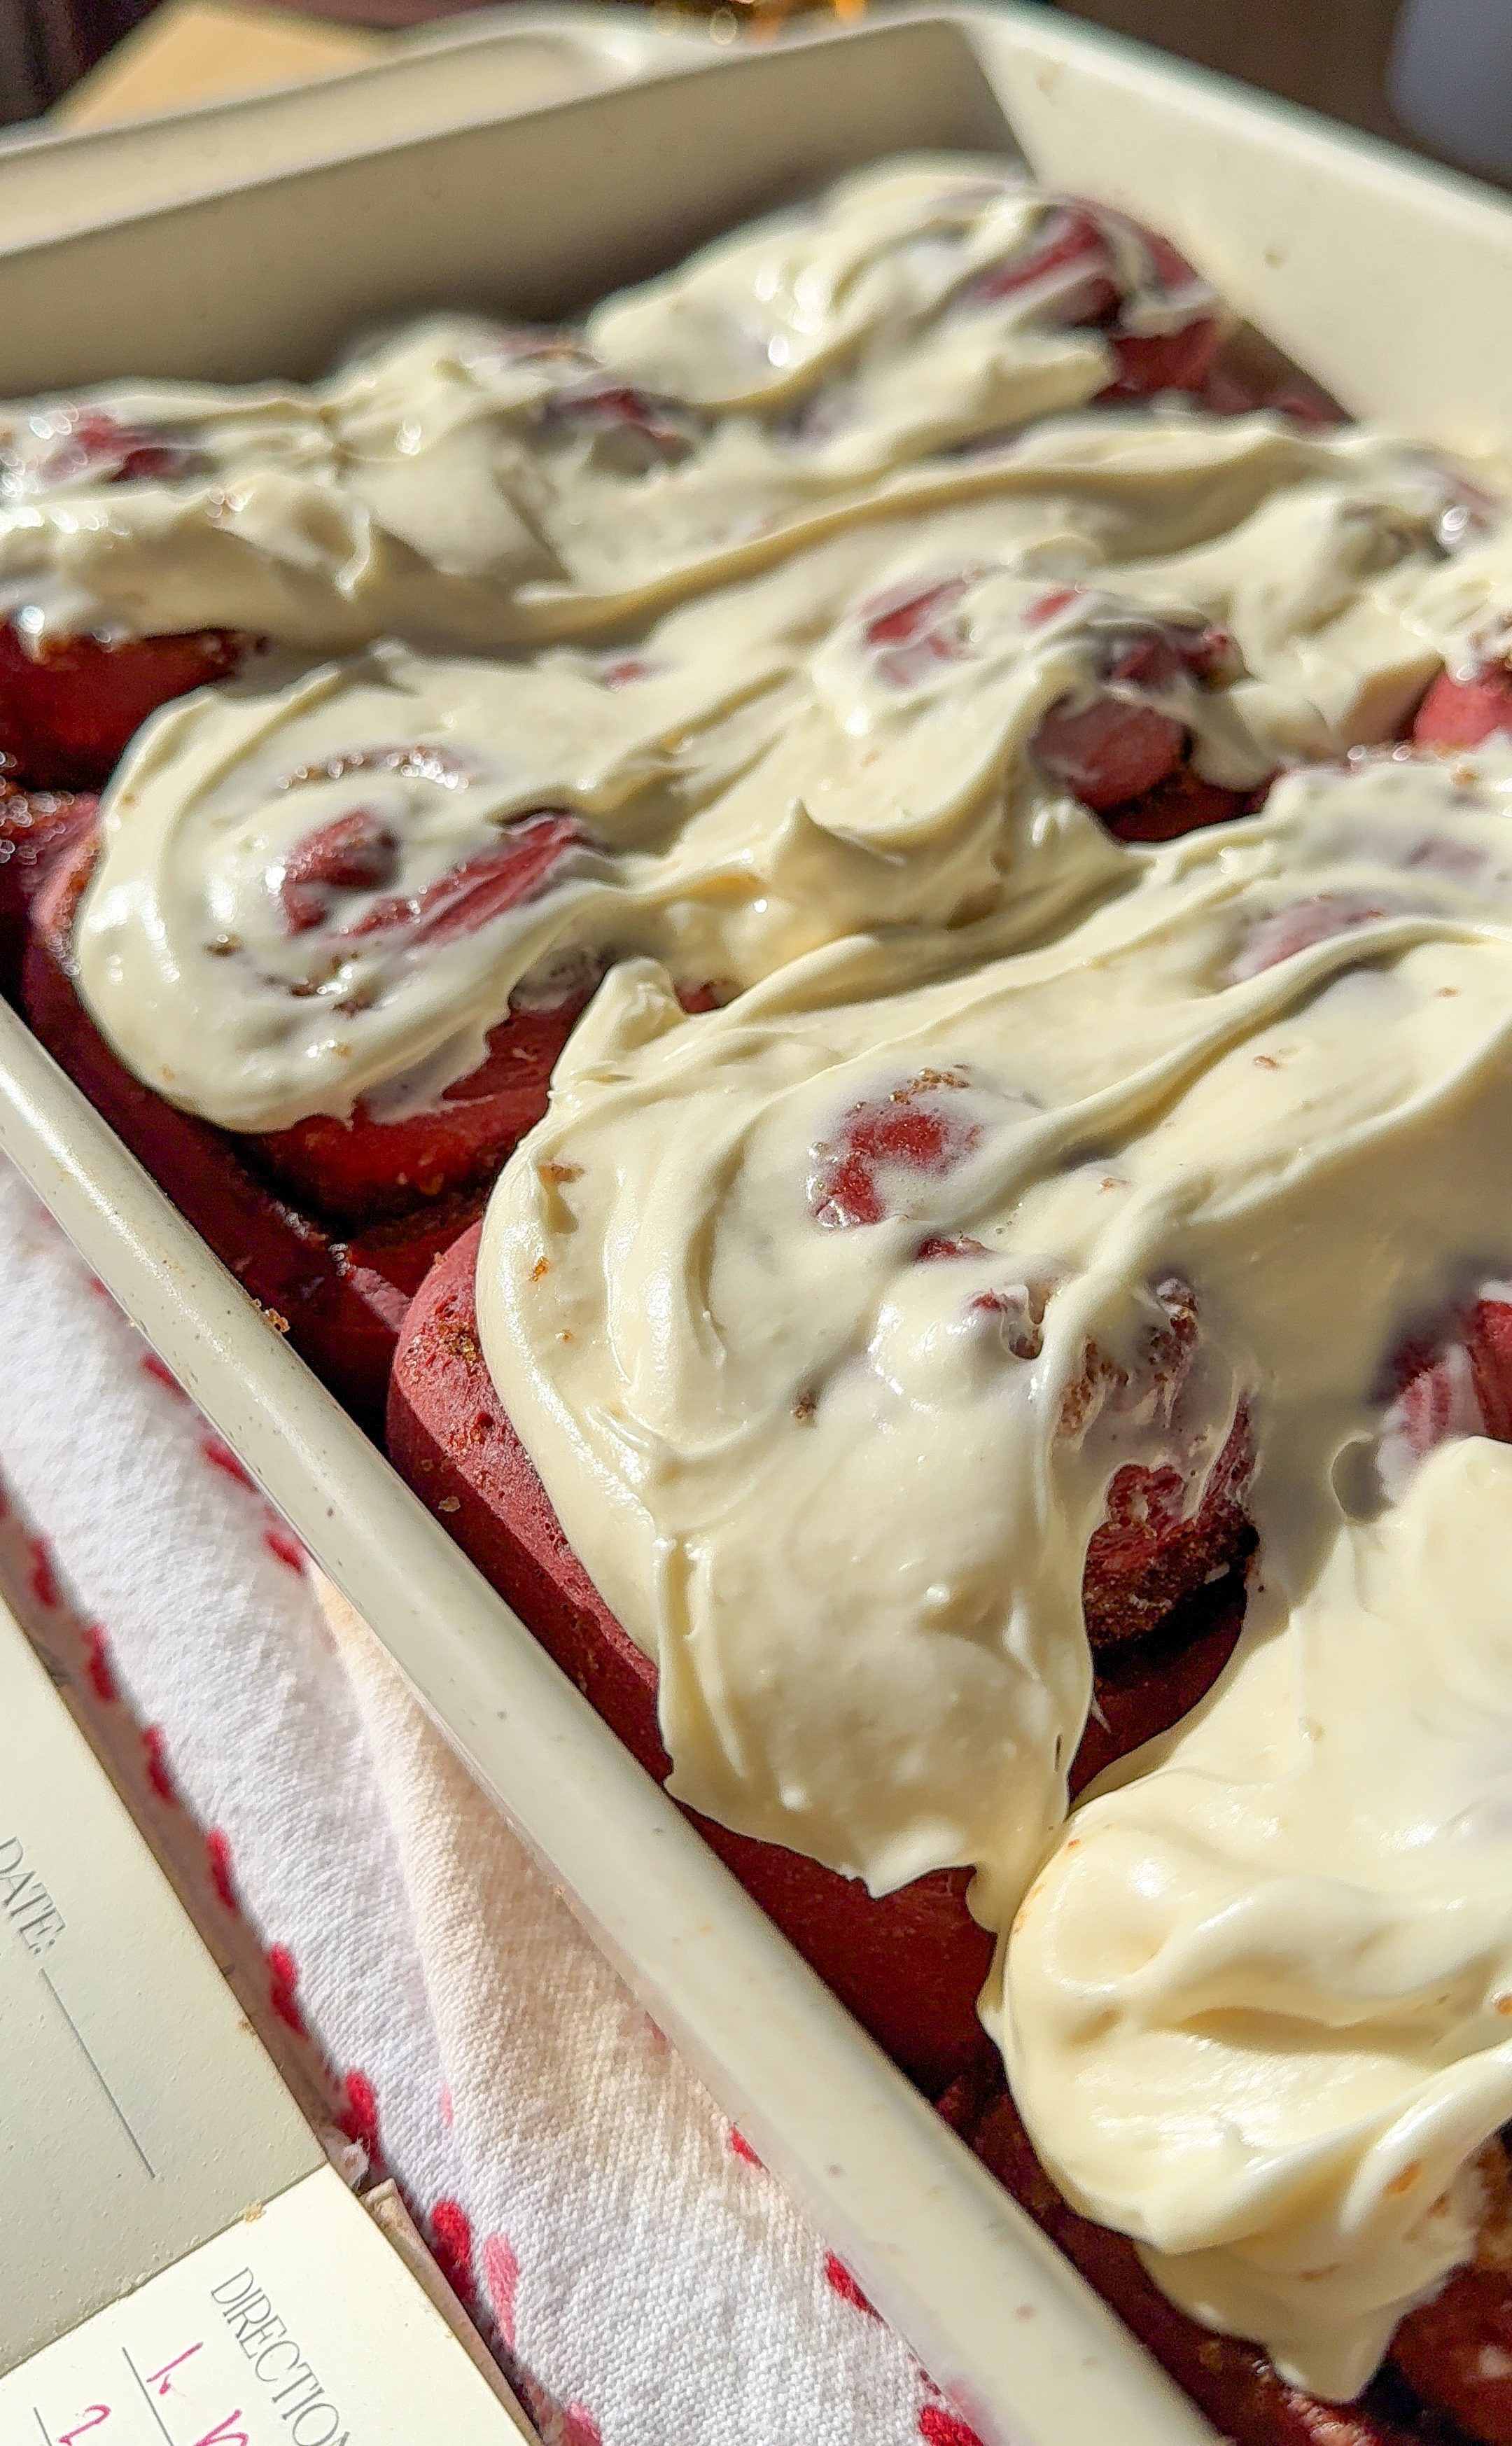
Let’s talk about love—because that’s exactly what these red velvet cinnamon rolls are made of. My boyfriend, Jay, is obsessed with all things red velvet. And cinnamon rolls? Well, those have been a favorite of mine for as long as I can remember. So naturally, I had to bring the two together. And let me tell you—these did not disappoint. When Jay took his first bite, he declared them “the most perfect cinnamon rolls / the best he ever had.” And since he’s brutally honest (which I actually love about him), I knew he meant it. So yeah, I basically set myself up for making these every Valentine’s Day for the rest of my life. No pressure, right? 😅
Speaking of pressure, working with yeast always feels a little intimidating, but trust me—these are so worth it. Yes, my kitchen looked like a cocoa-dusted war zone, and yes, I somehow got flour in my hair (again), but one bite of these red velvet cinnamon rolls with cake mixand all the mess was forgotten. If you love cinnamon rolls, red velvet, or just want to impress someone with a ridiculously good homemade treat, this recipe is for you!
! ❤️
Ingredients:
Warm whole milk: The warmth helps activate the yeast, allowing the dough to rise properly. It also contributes to a tender texture, making the cinnamon rolls irresistibly soft.
Active dry yeast: This is what makes the dough rise and become light and fluffy. Without it, the rolls would be dense and tough. Ensure it’s fresh for the best results!
Sugar: Feeds the yeast to help it activate and rise, while also adding a slight sweetness to the dough. A little sugar goes a long way!
Eggs: Provide structure, richness, and a tender crumb to the dough. They help create that soft and slightly chewy texture we all love in recipe for red velvet cinnamon rolls.
Unsalted butter: Adds moisture and richness while also contributing to the soft and fluffy texture. Using unsalted butter allows you to control the overall saltiness of the dough.
Red food coloring: This gives the cinnamon rolls their signature red hue. You can use gel food coloring for a more vibrant color, or opt for natural alternatives like beet powder.
Bread flour: Has a higher protein content than all-purpose flour, giving the dough strength and chewiness while keeping it light and airy. You can also use all purpose flour!
Cocoa powder: Adds depth of flavor with a hint of chocolate, making these red velvet rolls truly special. Use a good-quality cocoa powder for the best taste.
Salt: Enhances the overall flavor and balances the sweetness. Without it, the dough could taste flat and bland.
Light brown sugar: Creates a rich, caramel-like flavor as it melts into the dough while baking. It also provides extra moisture to the filling, keeping it gooey and soft.
Cinnamon: The star spice that makes cinnamon rolls what they are! It adds warmth, sweetness, and that classic cozy flavor we all crave.
Butter: Helps the filling adhere to the dough while adding extra richness. Softened butter ensures an even spread, creating the perfect cinnamon-sugar swirl in every bite.
Cream cheese: The tangy, creamy element that balances out the sweetness of the rolls. It creates a luscious, rich frosting that complements the flavors perfectly.
Butter: Adds a silky texture and a touch of richness to the icing. It also helps the frosting stay smooth and spreadable.
Powdered sugar: Sweetens and thickens the icing without making it grainy. Sift the powdered sugar before mixing for a perfectly smooth finish.
Vanilla extract: Enhances the depth of flavor in the icing, adding warmth and a hint of sweetness that rounds out the cream cheese perfectly.
What Is Red Velvet?
Red velvet is not just chocolate cake dyed red (despite what some people may think). It’s a delicate balance of cocoa, buttermilk, and acidity that creates a unique flavor—somewhere between chocolate and vanilla, with a subtle tang. The red color traditionally came from the reaction between natural cocoa powder and acidic ingredients, but nowadays, food coloring helps enhance that signature look. If you want to skip artificial dyes, I’ve got some natural alternatives listed below!equipment You’ll Need for Red Velvet Cinnamon Rolls
To make your easy red velvet cinnamon rolls come out perfectly, here’s a list of the essential equipment to have on hand:-
Mixing Bowls – You’ll need a few sturdy bowls to mix the dough and the filling. A large bowl for the dough and a smaller one for the cinnamon sugar filling should do the trick!
-
Measuring Cups– Accuracy is key in baking, especially with ingredients like flour, sugar, and yeast. Grab a good set of measuring cups and spoons.
-
Stand Mixer (or Hand Mixer) – While it’s possible to mix the dough by hand, a stand mixer will save you time and effort. The dough hook attachment is perfect for kneading the dough to that smooth, elastic texture we all love.
-
Rolling Pin – You’ll need this to roll out the dough. A sturdy rolling pin is ideal for making sure your dough is evenly spread and ready for that gooey cinnamon-sugar filling.
-
9×13 Baking Dish or Large Sheet Pan – This size pan will hold all your rolls comfortably as they bake and puff up into their soft, fluffy glory. If you want your rolls to be a bit more spread out, a sheet pan can work too.
- Pastry Brush – A pastry brush comes in handy when spreading melted butter over the dough or brushing on the cream cheese glaze at the end.
- Kitchen Towel – A clean towel to cover the dough while it rises. This helps keep the warmth in, ensuring your dough gets a good rise for those soft, pillowy rolls.
Red Velvet Cinnamon Rolls Substitutions & Modifications
- Natural Red Velvet Coloring: Try beet powder, raspberry juice, or natural food dyes.
- Dairy-Free? Swap the milk for almond milk and use vegan butter.
- Extra Mix-Ins: Mini chocolate chips, crushed Oreos, or even pecans for some crunch!

Easy Red Velvet Cinnamon Rolls Recipe
Video
Ingredients
For the Dough
- 1 cup warm whole milk
- 3 tsp active dry yeast
- ⅓ cup sugar
- 2 eggs
- ⅓ cup unsalted butter, melted
- 1 tsp red food coloring
- 3 ¾ cups bread flour
- ¼ cup cocoa powder
- 1 tsp salt
For the Filling
- 1 cup light brown sugar
- 2 tbsp cinnamon
- ¼ cup butter, stened
For the Cream Cheese Icing
- 6 oz cream cheese, room temp
- 4 tbsp butter, room temp
- 1 cup powdered sugar
- 1 tsp vanilla extract
Instructions
- Activate the Yeast: Heat the milk to 100-110°F and mix in the yeast and sugar. Let it sit until foamy (about 5 minutes). This step ensures the yeast is alive and ready to help the dough rise.
- Make the Red Velvet Dough: Add melted butter, eggs, and food coloring to the yeast mixture. Mix well. Then, gradually add cocoa powder, flour, and salt. Knead for 8-10 minutes until the dough is smooth and elastic.
- First Rise: Place the dough in a greased bowl, cover it with plastic wrap or a kitchen towel, and let it rise for 60-90 minutes, or until it doubles in size. This step allows the yeast to do its job and develop flavor.
- Fill: Roll the red velvet cinnamon roll dough out onto a lightly floured surface into a rectangle. Spread the softened butter over the dough, then sprinkle the cinnamon-sugar mixture evenly over the top.
- Cut, Roll, & Second Rise: Slice the dough into 12 equal pieces and roll them up. I prefer doing it this way because i find it a lot easier, but if you prefer to roll then cut then do it!! Then place them in a greased 9×13” baking dish. Cover and let them rise again for 30-45 minutes. This second rise ensures the rolls are extra fluffy.
- Bake: Preheat the oven to 350°F (175°C). Bake the red velvet cinnamon rolls for 20-25 minutes, or until lightly golden on top.
- Frost & Enjoy! While the red velvet cinnamon rolls cool slightly, make the icing by beating the cream cheese, butter, powdered sugar, and vanilla until smooth. Spread generously over the warm red velvet cinnamon rolls and enjoy!
Nutrition
Tips for Baking with Yeast
- Warm, but not hot milk! Yeast loves warmth, but if your milk is too hot (over 110°F), it’ll kill the yeast. Aim for 100-110°F. If you can comfortably dip your finger in, it’s just right.
- Patience is key. Yeast needs time to work its magic. Let the dough rise until doubled in size—don’t rush it!
- Knead, knead, knead. This develops gluten, which gives the rolls structure and chewiness. If using a stand mixer, knead for 8-10 minutes.
- A warm spot = better rise. If your kitchen is chilly, let the dough rise in an oven that’s off but with the light on.
Storage Instructions
- Room Temperature: If you plan to eat the red velvet rolls within a day, store them in an airtight container on the counter.
- Fridge: Store frosted or unfrosted red velvet cinnamon rolls in an airtight container for up to 3 days. Warm before serving for the best texture.
- Freezer: Freeze unfrosted cinnamon rolls in a freezer-safe container for up to 2 months. Thaw overnight in the fridge before reheating.
- Reheating:
- Microwave: Heat individual red velvet cinnamon rolls for 20-30 seconds for a warm, gooey texture.
- Oven: Cover rolls with foil and warm at 325°F for 8-10 minutes to revive that just-baked freshness.
More of my recipes
Do you LOVE Red Velvet?! Check out MORE of my Amazing Red Velvet Recipes:- The Best Brown Butter Red Velvet Banana Bread with Cream Cheese Glaze
- Soft Cream Cheese Red Velvet Cookies: A Valentine’s Day Treat Everyone Will Love!
- The Best Red Velvet Oreo Cookies Recipe – Soft, Chewy, & Irresistible
Conclusion
Whether you’re making these for Valentine’s Day, a weekend brunch, or just because, these red velvet cinnamon rolls will steal the show! The combination of soft, pillowy dough, rich cinnamon-sugar filling, and velvety cream cheese frosting is absolutely irresistible. Plus, they’re easier to make than you think—so don’t be afraid to give homemade cinnamon rolls a try! ❤️✨
If you try this recipe, let me know in the comments below! I love seeing your creations, so tag me on Instagram @munchiesbymallory and share your baking adventures! Happy baking! 🎉





Leave a Reply