

Ingredients:
Heavy Whipping Cream: Heavy whipping cream is the foundation of this homemade no-churn ice cream, providing the rich and creamy texture that defines the dessert. When whipped, the cream traps air, creating a light and airy consistency that’s essential for the smooth mouthfeel of ice cream. Its high-fat content (around 36%) ensures the ice cream is indulgent and luxurious, making it melt in your mouth with each bite.
Sweetened Condensed Milk: Sweetened condensed milk serves a dual purpose in this recipe: it acts as a sweetener and as a thickener. Its concentrated milk solids and sugar content help to create a creamy base without the need for additional sugar, stabilizers, or an ice cream maker. This ingredient also prevents the formation of ice crystals, ensuring the ice cream remains smooth and scoopable even after freezing.
Vanilla Extract: Vanilla extract enhances the overall flavor profile of the ice cream, adding a layer of warmth and depth that complements the creaminess. It acts as a natural flavor enhancer, balancing the sweetness of the condensed milk while providing a classic taste that pairs well with various mix-ins. Even a small amount of vanilla can elevate the entire dessert, making it more aromatic and delicious.
Salt: Salt might seem like an unusual addition to a sweet recipe, but it’s crucial for balancing flavors. It enhances the sweetness and brings out the nuanced flavors of the vanilla and dairy, preventing the ice cream from tasting overly sugary. Additionally, a small amount of salt helps to enhance the overall complexity of the ice cream, making each bite more satisfying and flavorful.
Brownie Brittle: The true star of the show! I used the Limited Edition Brownie Brittle Red, White & Blue M&M’S® Brownie Brittle. It adds the perfect crunch and sweetness to the ice cream, making it a delightful twist on the traditional chocolate brownie ice cream recipe.
Why You’ll Love This Recipe:
- No Equipment Needed: You don’t need an ice cream maker or any special gadgets—just a mixer and a freezer.
- Minimal Ingredients: With only four ingredients, you’ll be amazed at the rich, creamy texture and delicious flavor.
- Perfect For Hot Days: When it’s too hot to turn on the oven, this no-churn ice cream is the perfect solution.
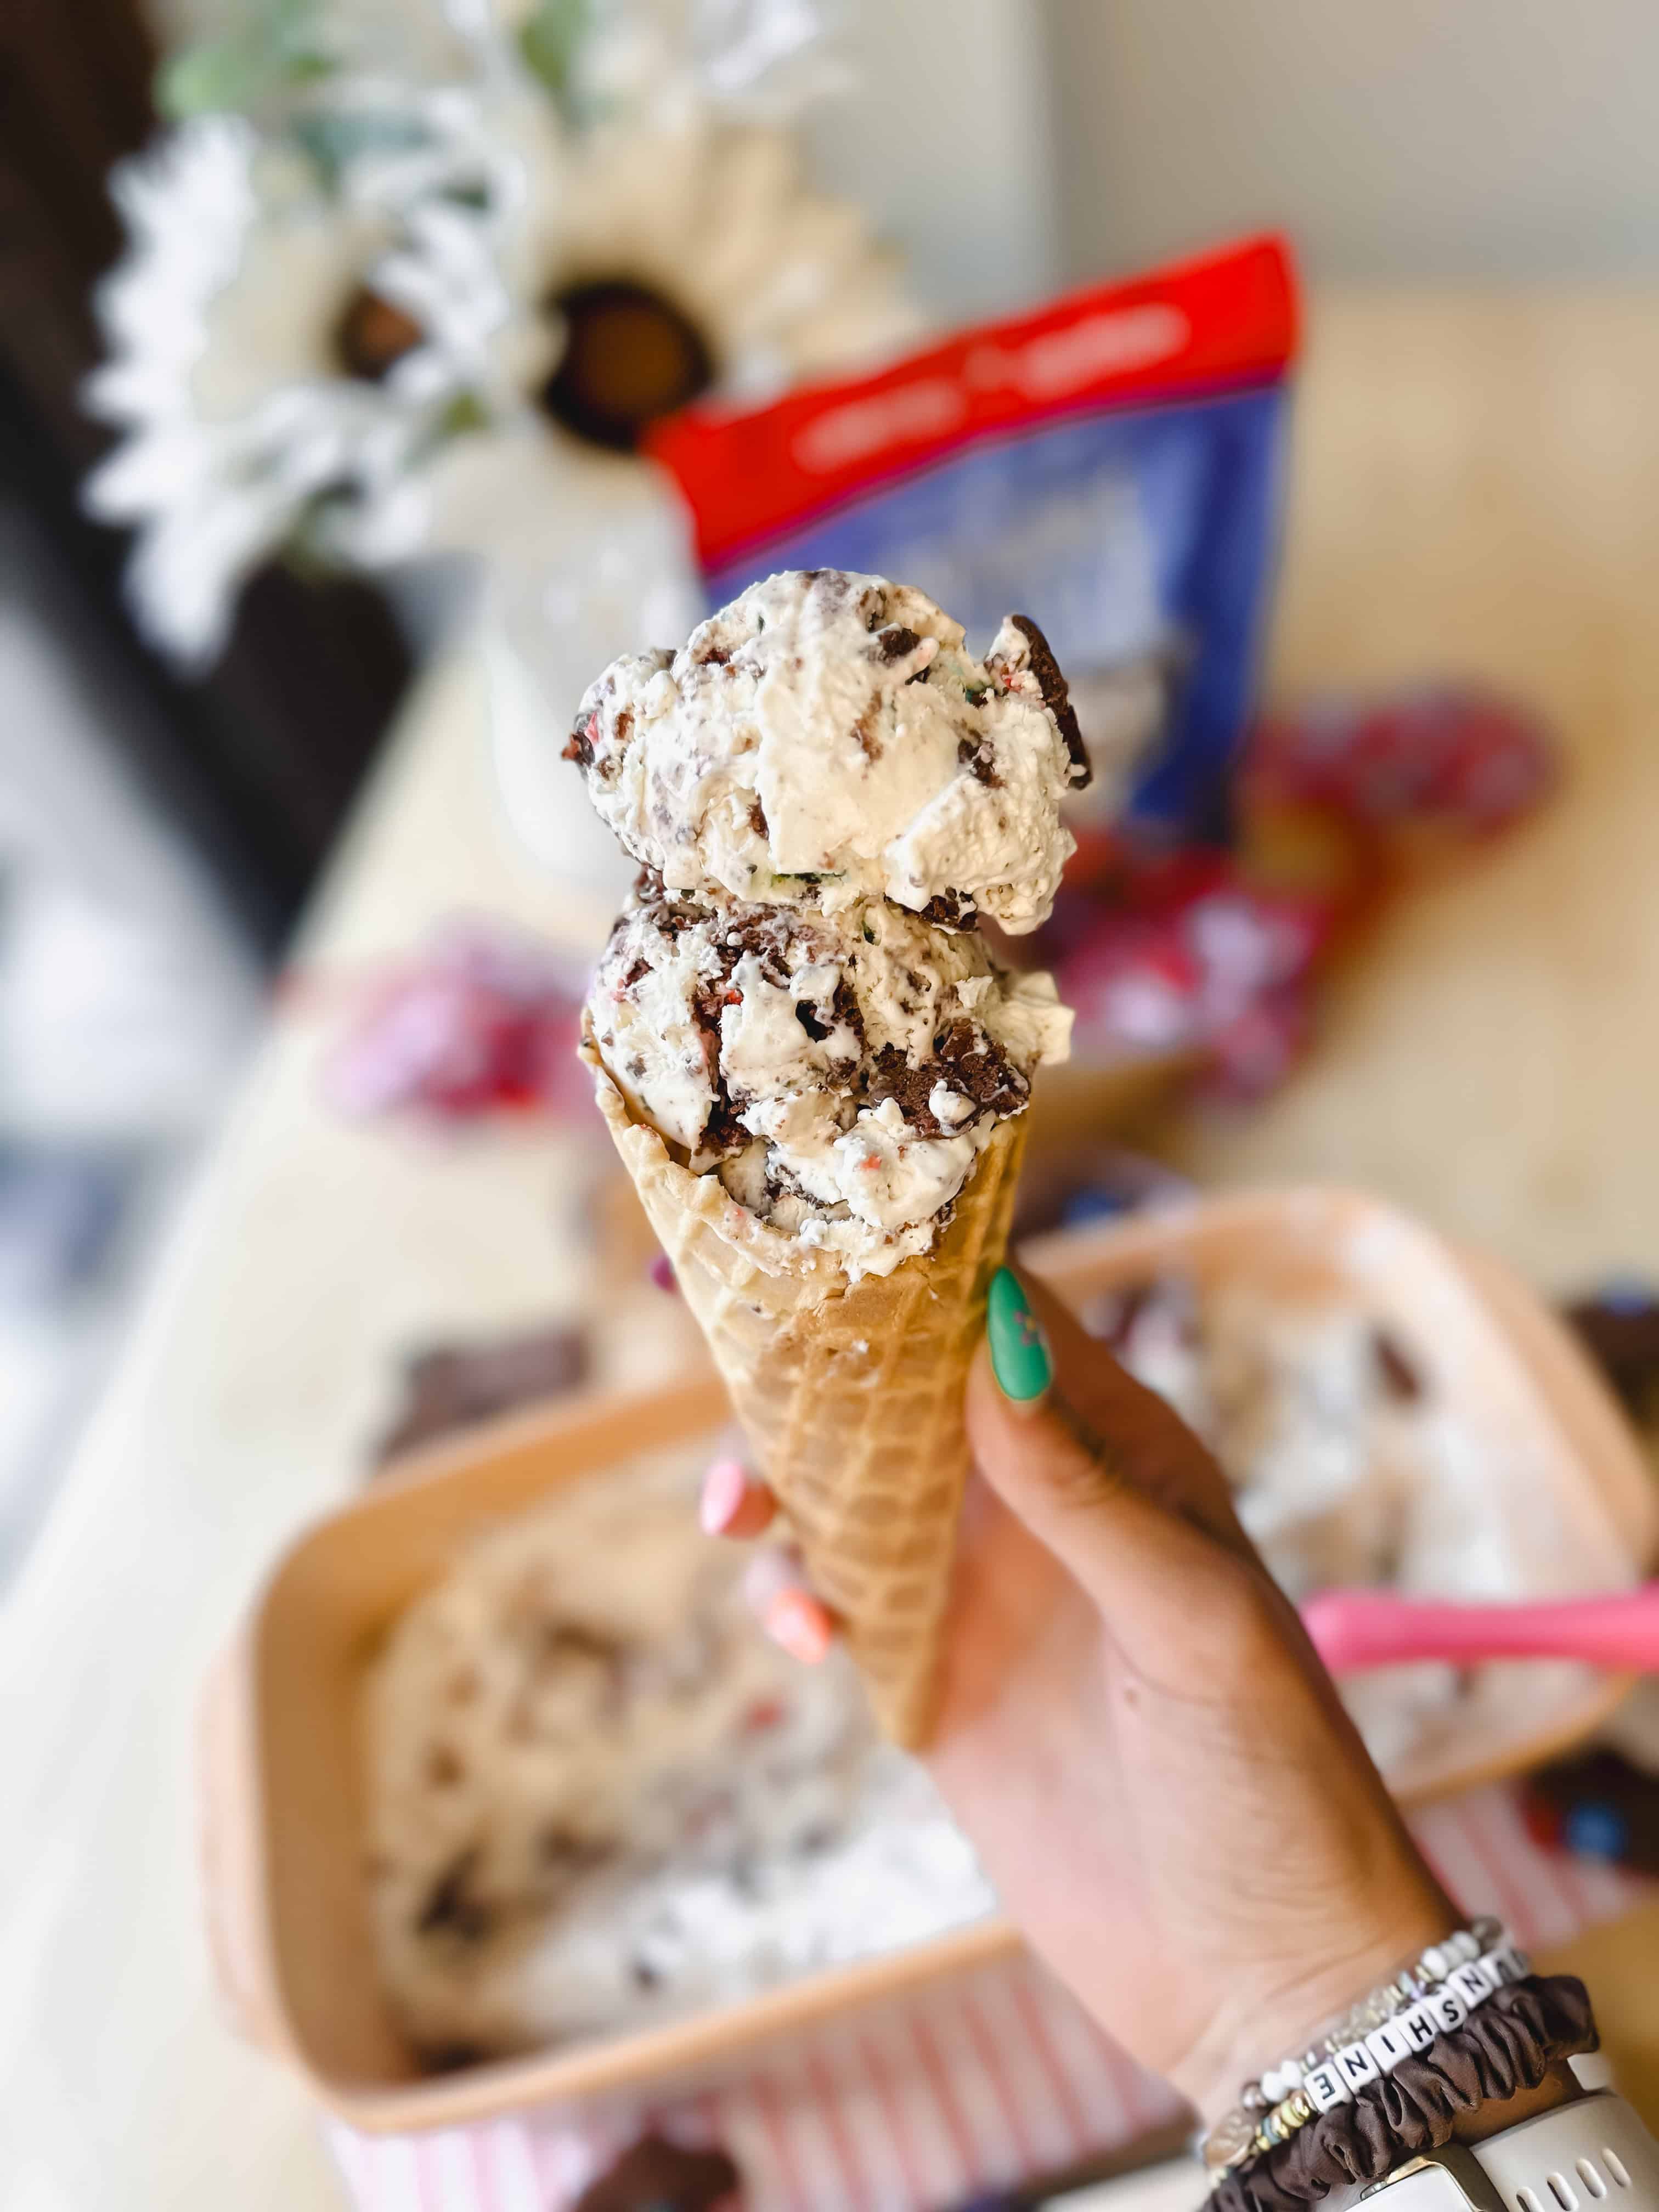
Brownie Brittle Red White & Blue M&M’s Ice Cream Recipe
Video
Ingredients
- 2 cups heavy whipping cream cold, straight out of the fridge
- 1 can sweetened condensed milk 14 ounces
- 1 tablespoon vanilla extract
- 1 teaspoon salt
- 1 cup crushed Brownie Brittle
Instructions
- Whip the Cream: In a large mixing bowl, using an electric whisk or a stand mixer, whisk the cold heavy whipping cream until peaks form. This usually takes about 2-3 minutes. You want the cream to be thick and fluffy.
- Combine Ingredients: Gently fold in the sweetened condensed milk, vanilla extract, and salt. Be very careful during this step; you don’t want to deflate the peaks you’ve just created. Use a spatula to slowly incorporate the ingredients until everything is well mixed.
- Add your Mix-Ins: In a bag, crush the Brownie Brittle into small pieces. Add into the ice cream batter & gently fold in.
- Freeze: Place the pan in the freezer & top with more Brownie Brittle. Let it chill for 6-8 hours. Patience is key here!
- Serve: Before serving, let the ice cream sit on the counter for about 10 minutes to soften slightly. This makes it easier to scoop and enhances the creamy texture.
Tips and Variations:
- Mix-Ins Galore: The beauty of this recipe lies in its versatility. Add any mix-ins you like: cookie dough, caramel swirls, peanut butter cups—the possibilities are endless!
- Serving Suggestions: Serve your homemade ice cream in cones, bowls, or even as a topping for warm desserts like brownies or pies.
- Storage: Store any leftovers (if there are any!) in an airtight container in the freezer for up to 2 weeks.
Storage Instructions
- Use Airtight Containers: To prevent ice crystals from forming and to maintain the creamy texture, store your ice cream in an airtight container. This helps to keep the ice cream fresh and free from any freezer odors.
- Cover with Plastic Wrap: Before sealing the container, press a layer of plastic wrap directly onto the surface of the ice cream. This extra layer of protection minimizes air exposure, further preventing ice crystals and freezer burn.
- Label and Date: Label your container with the flavor and the date you made the ice cream. Homemade ice cream is best enjoyed within 2 weeks, so keeping track of the date helps you enjoy it at its peak quality.
- Keep at the Back of the Freezer: Store the ice cream towards the back of the freezer where the temperature is most consistent. Avoid placing it in the door, as frequent temperature changes can affect the texture and quality.
- Soften Before Serving: Before serving, let the ice cream sit on the counter for about 5-10 minutes to soften slightly. This makes it easier to scoop and enhances the creamy texture.
Conclusion
Homemade no-churn ice cream is the perfect summer treat that requires minimal effort and delivers maximum satisfaction. With just four simple ingredients and endless possibilities for mix-ins, you can create a variety of delicious flavors right in your kitchen. Say goodbye to expensive equipment and hello to creamy, dreamy ice cream that’s ready to enjoy in just a few hours. Ready to cool off with your own homemade creation? Try this no-churn ice cream recipe and let your imagination run wild with mix-ins! Share your favorite combinations in the comments below, and don’t forget to tag me @munchiesbymallory on Instagram with your ice cream masterpieces. Happy scooping!





Leave a Reply