Okay I need to tell you something. This ice cream is the reason I immediately made a double batch during recipe testing. Like I didn’t even let the first batch fully disappear before I was back at the stove browning another stick of butter. That has literally never happened to me before and it should tell you EVERYTHING you need to know about this recipe.
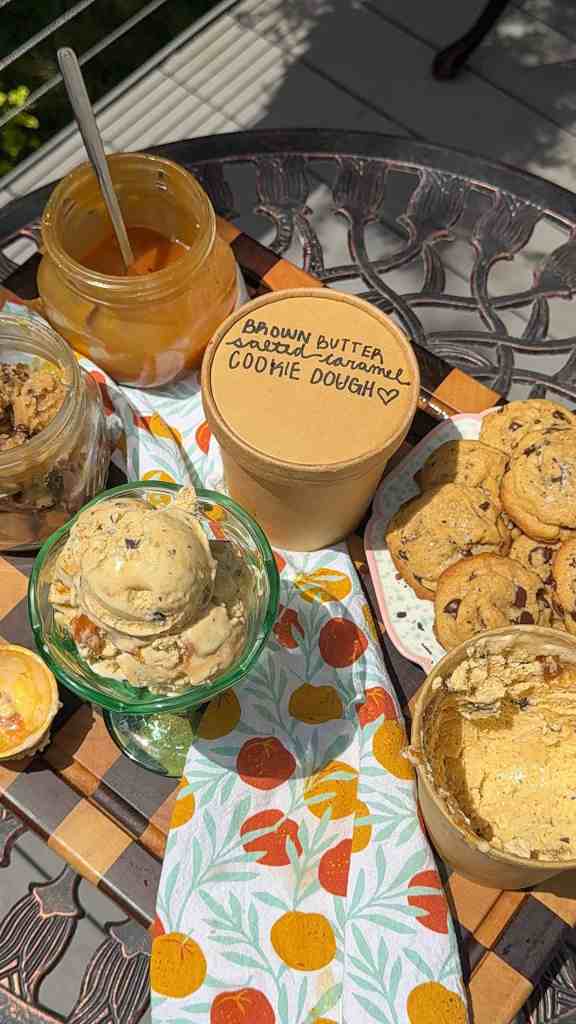
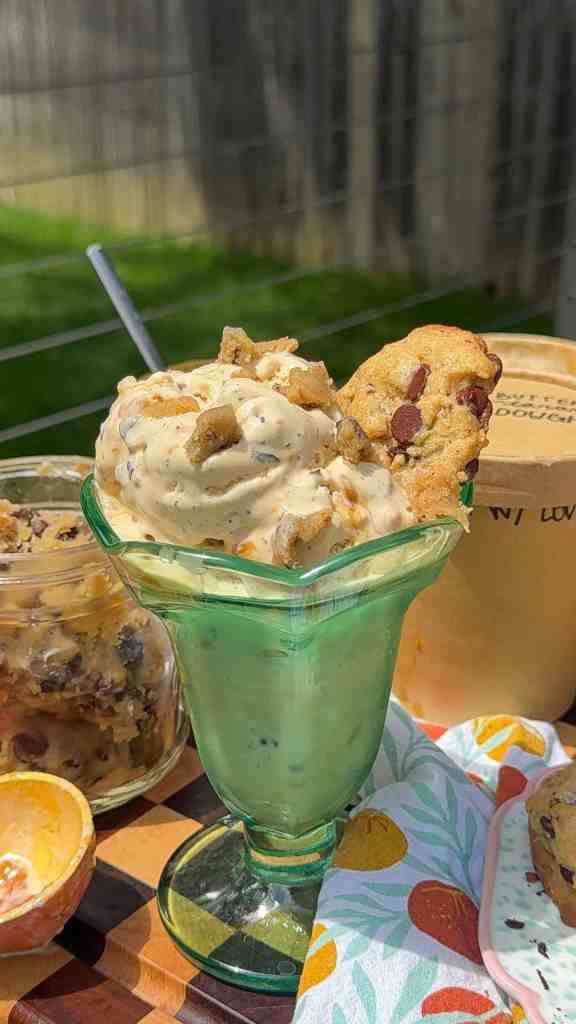
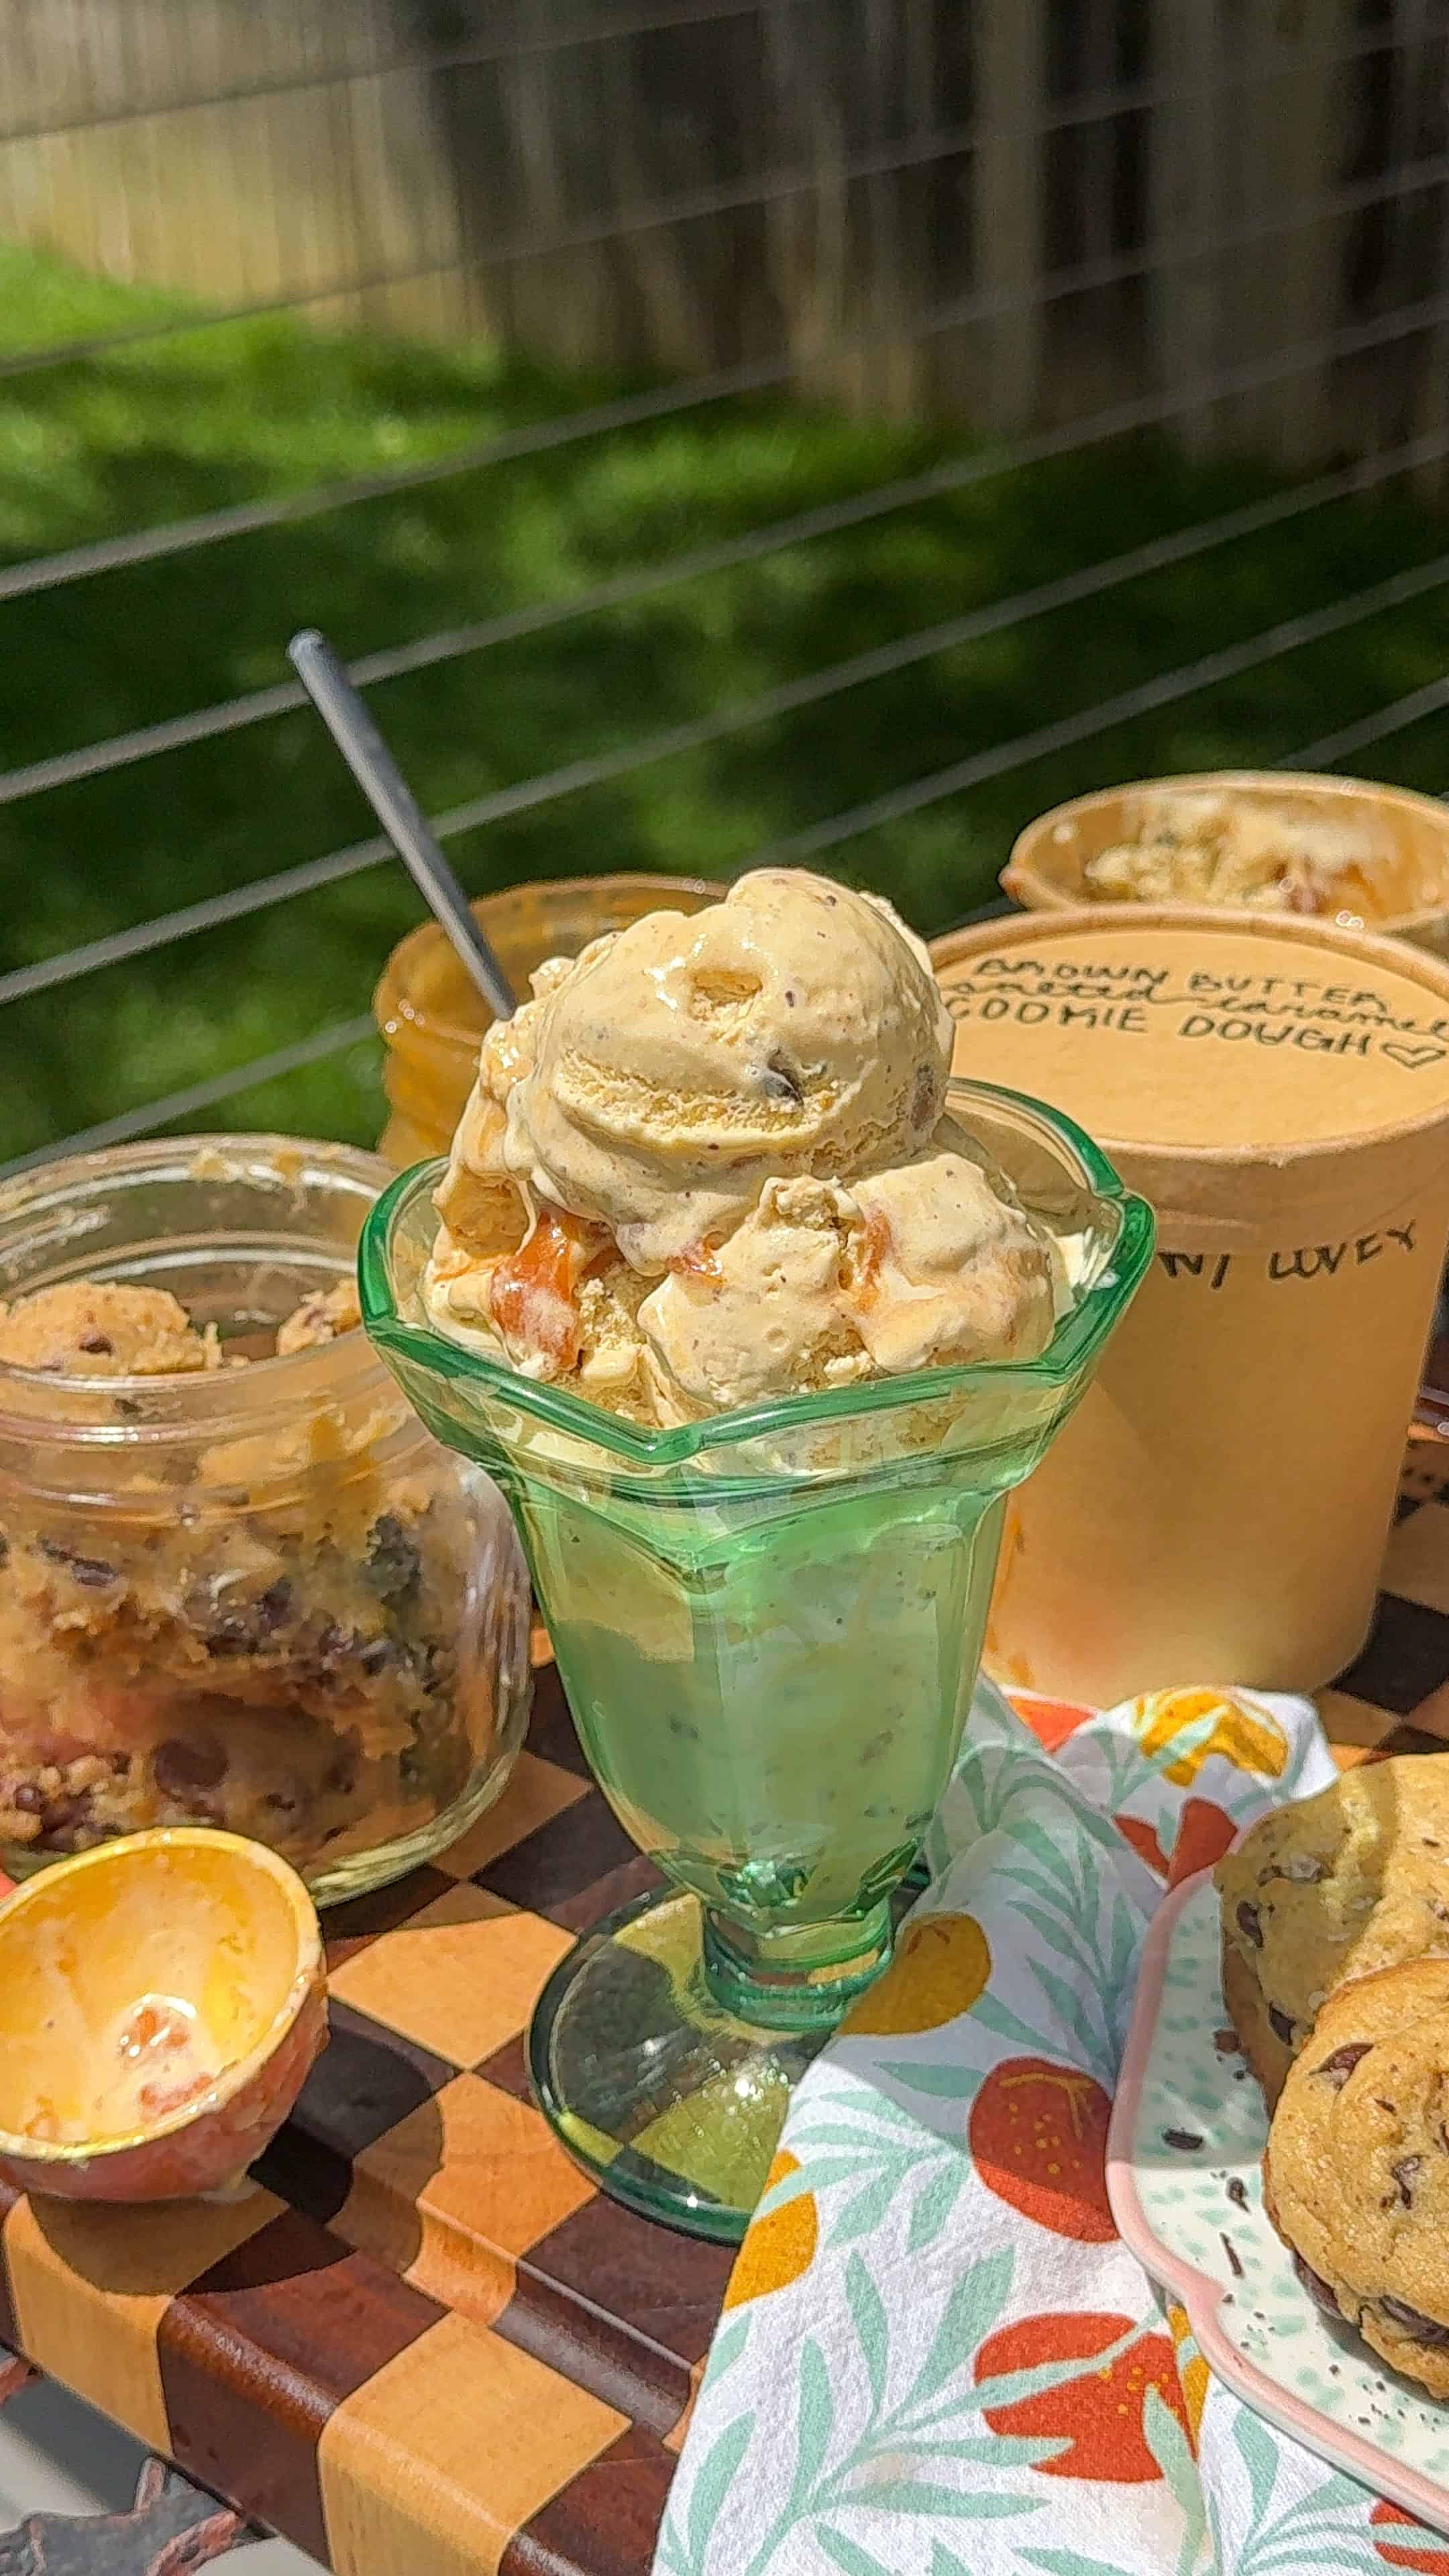
This is brown butter cookie dough ice cream with salted caramel and dark chocolate chunks, and it is my DREAM DESSERT in a single scoop. We’ve got the nutty custard base from the brown butter, chunks of edible cookie dough churned right in, ribbons of salted caramel swirled through the whole thing, and dark chocolate chunks in every single bite. My family had it and immediately requested I make it again. That’s the sign of a truly GREAT recipe, love.
This uses my brown butter custard base that I use across my whole summer ice cream series, and if you’ve made any of my other flavors you already know how rich and creamy this custard gets. The cookie dough is a scaled-down version of my standalone edible cookie dough recipe and it churns right in during the last couple minutes so you get perfect little pockets of dough throughout. The salted caramel gets swirled in at the end for those gorgeous ribbons that hit you mid-scoop.
This one is special. Like, genuinely one of my favorites I’ve ever made. I hope you love it as much as my family does.
P.S. Make sure your cookie dough is fully chilled before you add it to the ice cream maker. Room temp dough will just dissolve into the base instead of staying in chunks!

Ingredients Needed
- Unsalted Butter: This butter is doing double duty. You’ll brown it on the stovetop until the milk solids turn golden and nutty, and then it gets incorporated into the custard as the fat base. Browning it first gives the entire ice cream that signature toasty, caramel-adjacent depth that makes this flavor so much more interesting than a standard vanilla base.
- Egg Yolks: Four egg yolks are what give this custard its rich, thick, velvety texture. The yolks cook into the hot milk mixture and create a proper creme anglaise style base that churns into an incredibly creamy ice cream. Don’t skip the tempering step — adding the hot liquid slowly is what keeps them from scrambling.
- Light Brown Sugar: Brown sugar in the custard base adds a subtle molasses warmth that plays beautifully alongside the browned butter. It dissolves into the egg yolks and creates the foundation of sweetness for the whole dessert. Light brown sugar is perfect here — dark brown would be too intense and compete with the other flavors.
- Whole Milk: Whole milk forms the main liquid of the custard. Its fat content is important for getting a smooth, creamy texture that isn’t icy. Don’t substitute lower fat milk here — the richness of whole milk is what makes this custard work.
- Vanilla Bean Paste: Vanilla bean paste gives you all the flavor of a real vanilla bean with those gorgeous little specks throughout the custard, without the hassle of splitting and scraping a pod. It adds a warm, floral sweetness that ties together the nuttiness of the brown butter and the richness of the egg yolks.
- Heavy Cream: Folded into the custard base, heavy cream is what takes this from a rich pudding to a proper ice cream. It adds lightness and body and is essential for the churning process. Full-fat is non-negotiable here.
- Edible Brown Butter Cookie Dough: Edible brown butter cookie dough gets churned right into the ice cream during the last 1-2 minutes in the machine. Because it’s already safe to eat raw (no eggs, heat-treated flour), you can add it directly without any worries. Chilling it thoroughly before churning is key so it stays in chunks rather than melting into the base.
- Salted Caramel: The salted caramel gets swirled through the ice cream after churning for those ribbons of gooey, salty-sweet goodness in every scoop. Store-bought works perfectly here and saves you a step. If you want to make your own, a simple homemade version is absolutely delicious and takes about 15 minutes.
- Dark Chocolate, Coarsely Chopped: Three ounces of coarsely chopped dark chocolate gets churned in during the last couple minutes alongside the cookie dough. Dark chocolate is the right call here because its slight bitterness balances all the sweetness happening in the other components. Coarsely chopping it yourself gives you irregular chunks of all different sizes which is SO much better than uniform chips.
Substitutions and Modifications
- Salted caramel: Store-bought is totally fine and what I use when I’m short on time. Any good quality jarred caramel works. Just make sure it’s salted or add a pinch of flaky salt to a plain caramel.
- Dark chocolate: Swap for semi-sweet if you prefer a sweeter chocolate note. Chocolate chips work in a pinch but coarsely chopped chocolate gives you better, more irregular chunks.
- No KitchenAid attachment? You can use any ice cream maker you have. You can also do a no-churn version by folding everything into whipped heavy cream and sweetened condensed milk — the texture will be slightly different but still delicious.
- Cookie dough mix-ins: The base cookie dough recipe is flexible. Try it with white chocolate chips, peanut butter chips, or crushed graham crackers instead of the standard chocolate chips.
Why You’ll Love This Recipe
- It’s three desserts in one. Brown butter ice cream, edible cookie dough, AND salted caramel swirl. Every single bite has something different going on and it is CHAOS in the best possible way.
- The brown butter base is next level. Browning the butter before making the custard adds a deep, nutty richness to the ice cream that you just don’t get from a standard vanilla base. It’s the same move that makes my edible cookie dough so good.
- It’s fully customizable. Use store-bought salted caramel to keep it simple, or make your own if you’re feeling fancy. Both work perfectly.
Equipment Needed
- Medium saucepan: You’ll use this for browning the butter and building the custard base. A light-colored pan helps you see the butter as it browns so you can pull it at exactly the right moment.
- Large mixing bowl: For whisking your egg yolks and sugar together before tempering, and for cooling the finished custard.
- Whisk: Essential for keeping the custard smooth while you temper the hot liquids into the egg yolks.
- Instant-read thermometer: You need this for two things in this recipe — hitting 165°F when heat-treating the cookie dough flour, and monitoring your custard as it cooks to 170-175°F.
- Fine mesh strainer: For straining the finished custard into your bowl before chilling. This catches any bits of cooked egg so your base is perfectly silky.
- KitchenAid stand mixer with ice cream attachment: This is what churns the custard into that thick, creamy, dreamy ice cream. Freeze the bowl for at least 15 hours before you plan to churn.
- Loaf pan or freezer-safe container: For storing and finishing the ice cream. A standard 9×5 loaf pan works perfectly and gives you beautiful scoops.
Brown Butter Cookie Dough Ice Cream (with Salted Caramel)
Ingredients
For the Brown Butter Custard Base:
- ½ cup unsalted butter
- 4 egg yolks
- ½ cup light brown sugar packed
- 1 cup whole milk
- 1 tbsp vanilla bean paste
- 1 cup heavy cream
Edible Brown Butter Cookie Dough:
- ¼ cup unsalted butter
- 6 tbsp light brown sugar packed
- ½ tsp vanilla extract
- 1 tbsp milk
- ½ cup all-purpose flour heat-treated
- ¼ cup semi-sweet chocolate chips
- ¼ cup mini chocolate chips
For the Mix-Ins:
- ¼ cup salted caramel store-bought or homemade
- 3 oz dark chocolate coarsely chopped
Instructions
- Brown the butter. In your medium saucepan over medium heat, cook the 1/2 cup butter, stirring frequently, until the foam subsides, it turns golden, and you smell that nutty aroma. Pour into a heatproof bowl or measuring cup and set aside.
- Whisk the egg yolks and sugar over heat. Add the egg yolks and brown sugar to your saucepan over medium-low heat, whisking constantly until the mixture is pale, slightly thickened, and warmed through, about 2-3 minutes.
- Temper in the brown butter. Remove the pan from heat. Very slowly drizzle the browned butter into the egg yolk mixture, just a tiny bit at a time, whisking constantly the entire time until fully incorporated.
- Temper in the milk. Still off the heat, slowly pour the whole milk into the pan in the same way, whisking constantly as you drizzle it in.
- Return to heat and cook the custard. Place the pan back over medium-low heat and cook, stirring constantly with a rubber spatula, until the custard thickens enough to coat the back of a spoon and reaches 170-175°F. Do not let it boil.
- Strain and cool. Pour through a fine mesh strainer into a large clean bowl. Stir in the vanilla bean paste and heavy cream. Set over an ice bath and stir until cooled, then cover and refrigerate until the custard reaches 65°F or below — at least 4 hours or overnight.
- Make the cookie dough. Once your custard is chilling, brown the 1/4 cup butter in a saucepan over medium heat, stirring frequently until golden and nutty smelling. Pour into a mixing bowl and let cool 5 minutes. Add the brown sugar and stir to combine, then add the vanilla and milk and stir until smooth. Heat-treat the flour in the microwave in 30-second intervals, stirring between each, until it reaches 165°F on your thermometer. Let it cool completely, then stir into the butter mixture until fully incorporated with no dry streaks. Fold in both chocolate chips. Press into an even layer in a small container, cover, and refrigerate until fully chilled — at least 2 hours or overnight alongside your custard.
- Churn. Pour the chilled custard into your frozen KitchenAid ice cream attachment bowl and churn according to manufacturer instructions, about 25-30 minutes, until thick and creamy. In the last 1-2 minutes of churning, crumble in the chilled cookie dough and add the chopped dark chocolate. Let the machine fully incorporate them.
- Swirl and freeze. Scoop half the churned ice cream into your loaf pan or freezer container. Drizzle half the salted caramel over it. Add the remaining ice cream on top and drizzle the rest of the caramel. Use a knife or skewer to gently swirl it through. Cover tightly and freeze for at least 4 hours until firm.
- Scoop and serve. Let the ice cream sit at room temperature for 3-5 minutes before scooping. Enjoy!
Storage Instructions
- Counter: Do not leave this out at room temperature for more than 5-10 minutes before serving. This is a rich custard-based ice cream and it softens quickly.
- Freezer: Store tightly covered in your loaf pan or a freezer-safe airtight container for up to 6 weeks. Press a piece of plastic wrap directly onto the surface of the ice cream before putting the lid on to prevent ice crystals from forming on top.
- Refreezing: If your ice cream softens significantly while scooping (it happens!), spread it back into an even layer, re-cover, and freeze for 30 minutes before scooping again. It comes right back.
Tips and Tricks
- Make everything the day before. The cookie dough needs to be fully chilled so it stays in chunks when you churn it in. And the custard absolutely MUST be chilled to 65°F or below before churning or it won’t freeze properly in the machine. Overnight is always best.
- Freeze your KitchenAid bowl for at least 15 hours. I know it says 15 in the manual and people always try to get away with less. Don’t. A fully frozen bowl is the difference between thick, creamy ice cream and a sad soft serve situation.
- Chop the chocolate yourself. Pre-made chocolate chips are designed not to melt, which means they can be waxy and uniform. Chopping a bar of good dark chocolate yourself gives you shards and chunks of all different sizes and the flavor is so much better.
- Don’t over-swirl the caramel. You want distinct ribbons of salted caramel running through the ice cream, not caramel fully mixed in. A few gentle passes with a knife is all you need.
Frequently Asked Questions
Do I have to make the custard base the day before?
You don’t HAVE to but you really should. The custard needs to chill completely to 65°F or below before it goes into the ice cream maker — warm custard will not churn properly and you’ll end up with a soupy mess. Making it the night before means it’s perfectly cold and ready to go, and honestly the flavor deepens overnight too.
Can I use store-bought cookie dough instead of making the edible version?
Store-bought cookie dough is NOT safe to eat raw because it contains raw eggs and untreated flour. You must use a specifically formulated edible cookie dough (like the recipe included here) or a commercially sold edible cookie dough product. Do not substitute regular baking cookie dough.
My ice cream came out icy instead of creamy. What happened?
This is almost always one of two things: the custard wasn’t cold enough before churning, or the KitchenAid bowl wasn’t frozen long enough. Both are easy fixes for next time. Also make sure you’re using whole milk and full-fat heavy cream — lower fat substitutes lead to icier results.
Can I use a different ice cream maker?
Yes! Any ice cream maker works with this custard base. Follow your machine’s specific instructions for timing. If you don’t have an ice cream maker at all, you can try a no-churn method — whip 1 cup of heavy cream to stiff peaks, fold in the custard base, then fold in your mix-ins and freeze. The texture will be different but still really good.
How far in advance can I make this?
This ice cream is at its absolute best within the first week, when the cookie dough is still soft and the caramel ribbons are still distinct. It keeps well for up to 6 weeks but the mix-ins will firm up considerably over time. If you’re making it for a special occasion I’d recommend making it 1-3 days ahead for the best texture and presentation.
Can I add more salted caramel?
Is that even a question? YES. A quarter cup gives you beautiful swirls without overwhelming the other flavors, but if caramel is your love language go ahead and add a little more. Just be mindful that too much extra liquid can affect how the ice cream freezes and sets.
More Recipes You’ll Love:
Edible Brown Butter Cookie Dough (No Eggs, No Bake)
Homemade Espresso Brownie Ice Cream with Salted Caramel
Salted Caramel Brown Butter Banana Bread Cookies
Let’s Make It!
This is the one, love. The one you make when you want to absolutely blow someone’s mind with a homemade ice cream. Brown butter, cookie dough, salted caramel, dark chocolate — it’s got everything. Make it this weekend and let me know what you think!
Tag me in your scoops over on Instagram and TikTok at @munchiesbymallory — I genuinely live for seeing your recreations and I repost as many as I can. Happy churning! 🍪🍨


Leave a Reply Cancel reply