
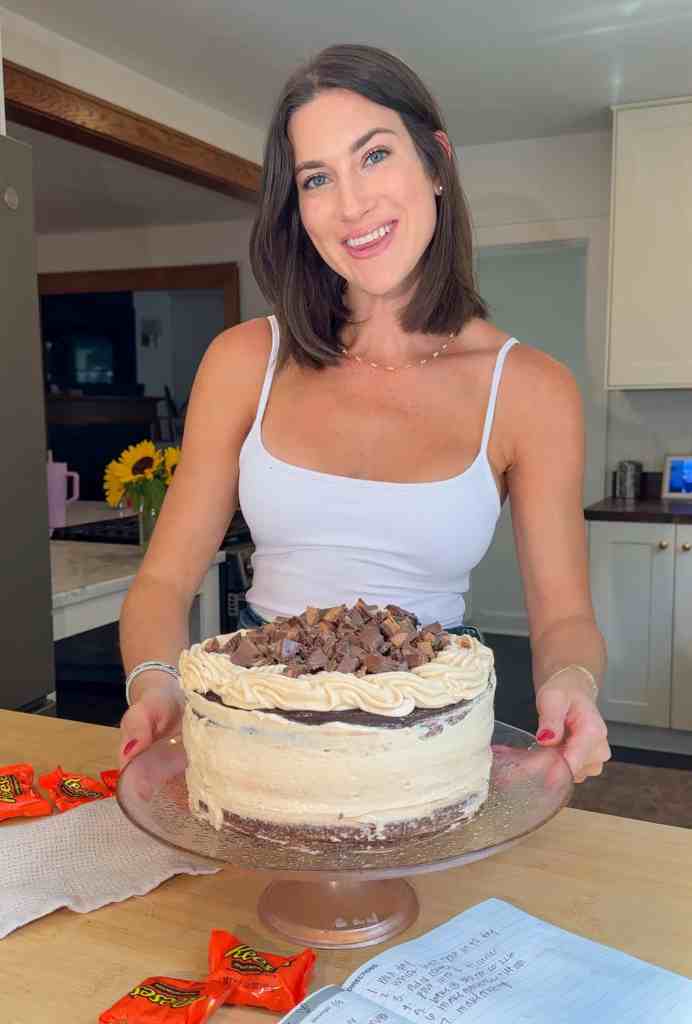
Okay, let me set the scene for you. I am one of FIVE kids, which means the competition to be mom’s favorite is real, it is fierce, and I take it VERY seriously. So when my mom asked for a peanut butter cake for her birthday, you already know I was going to go all the way out for her. No shortcuts, no “good enough,” just the most over the top, decadent, show stopping cake I could possibly dream up. Because honestly? She deserves it.
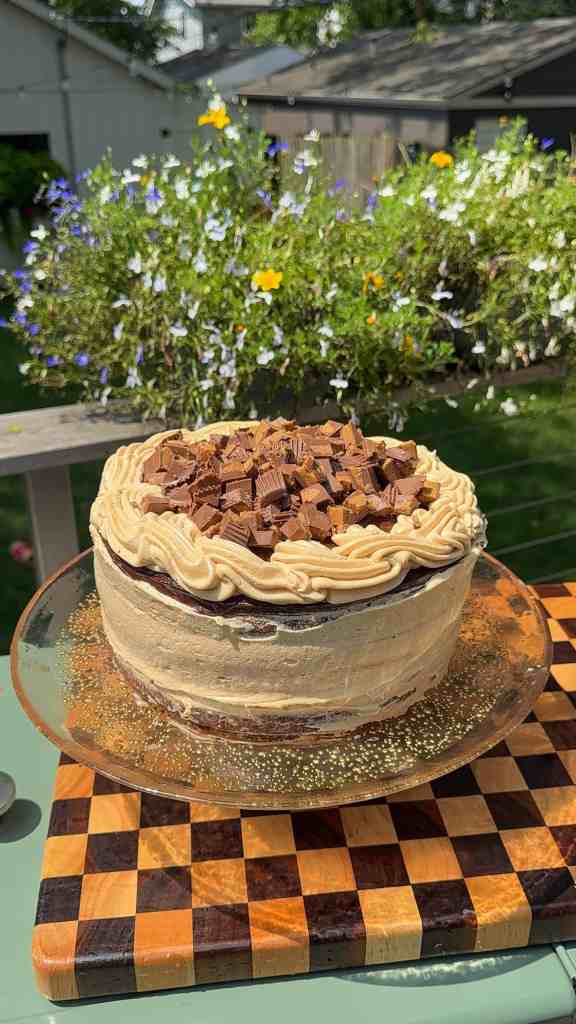
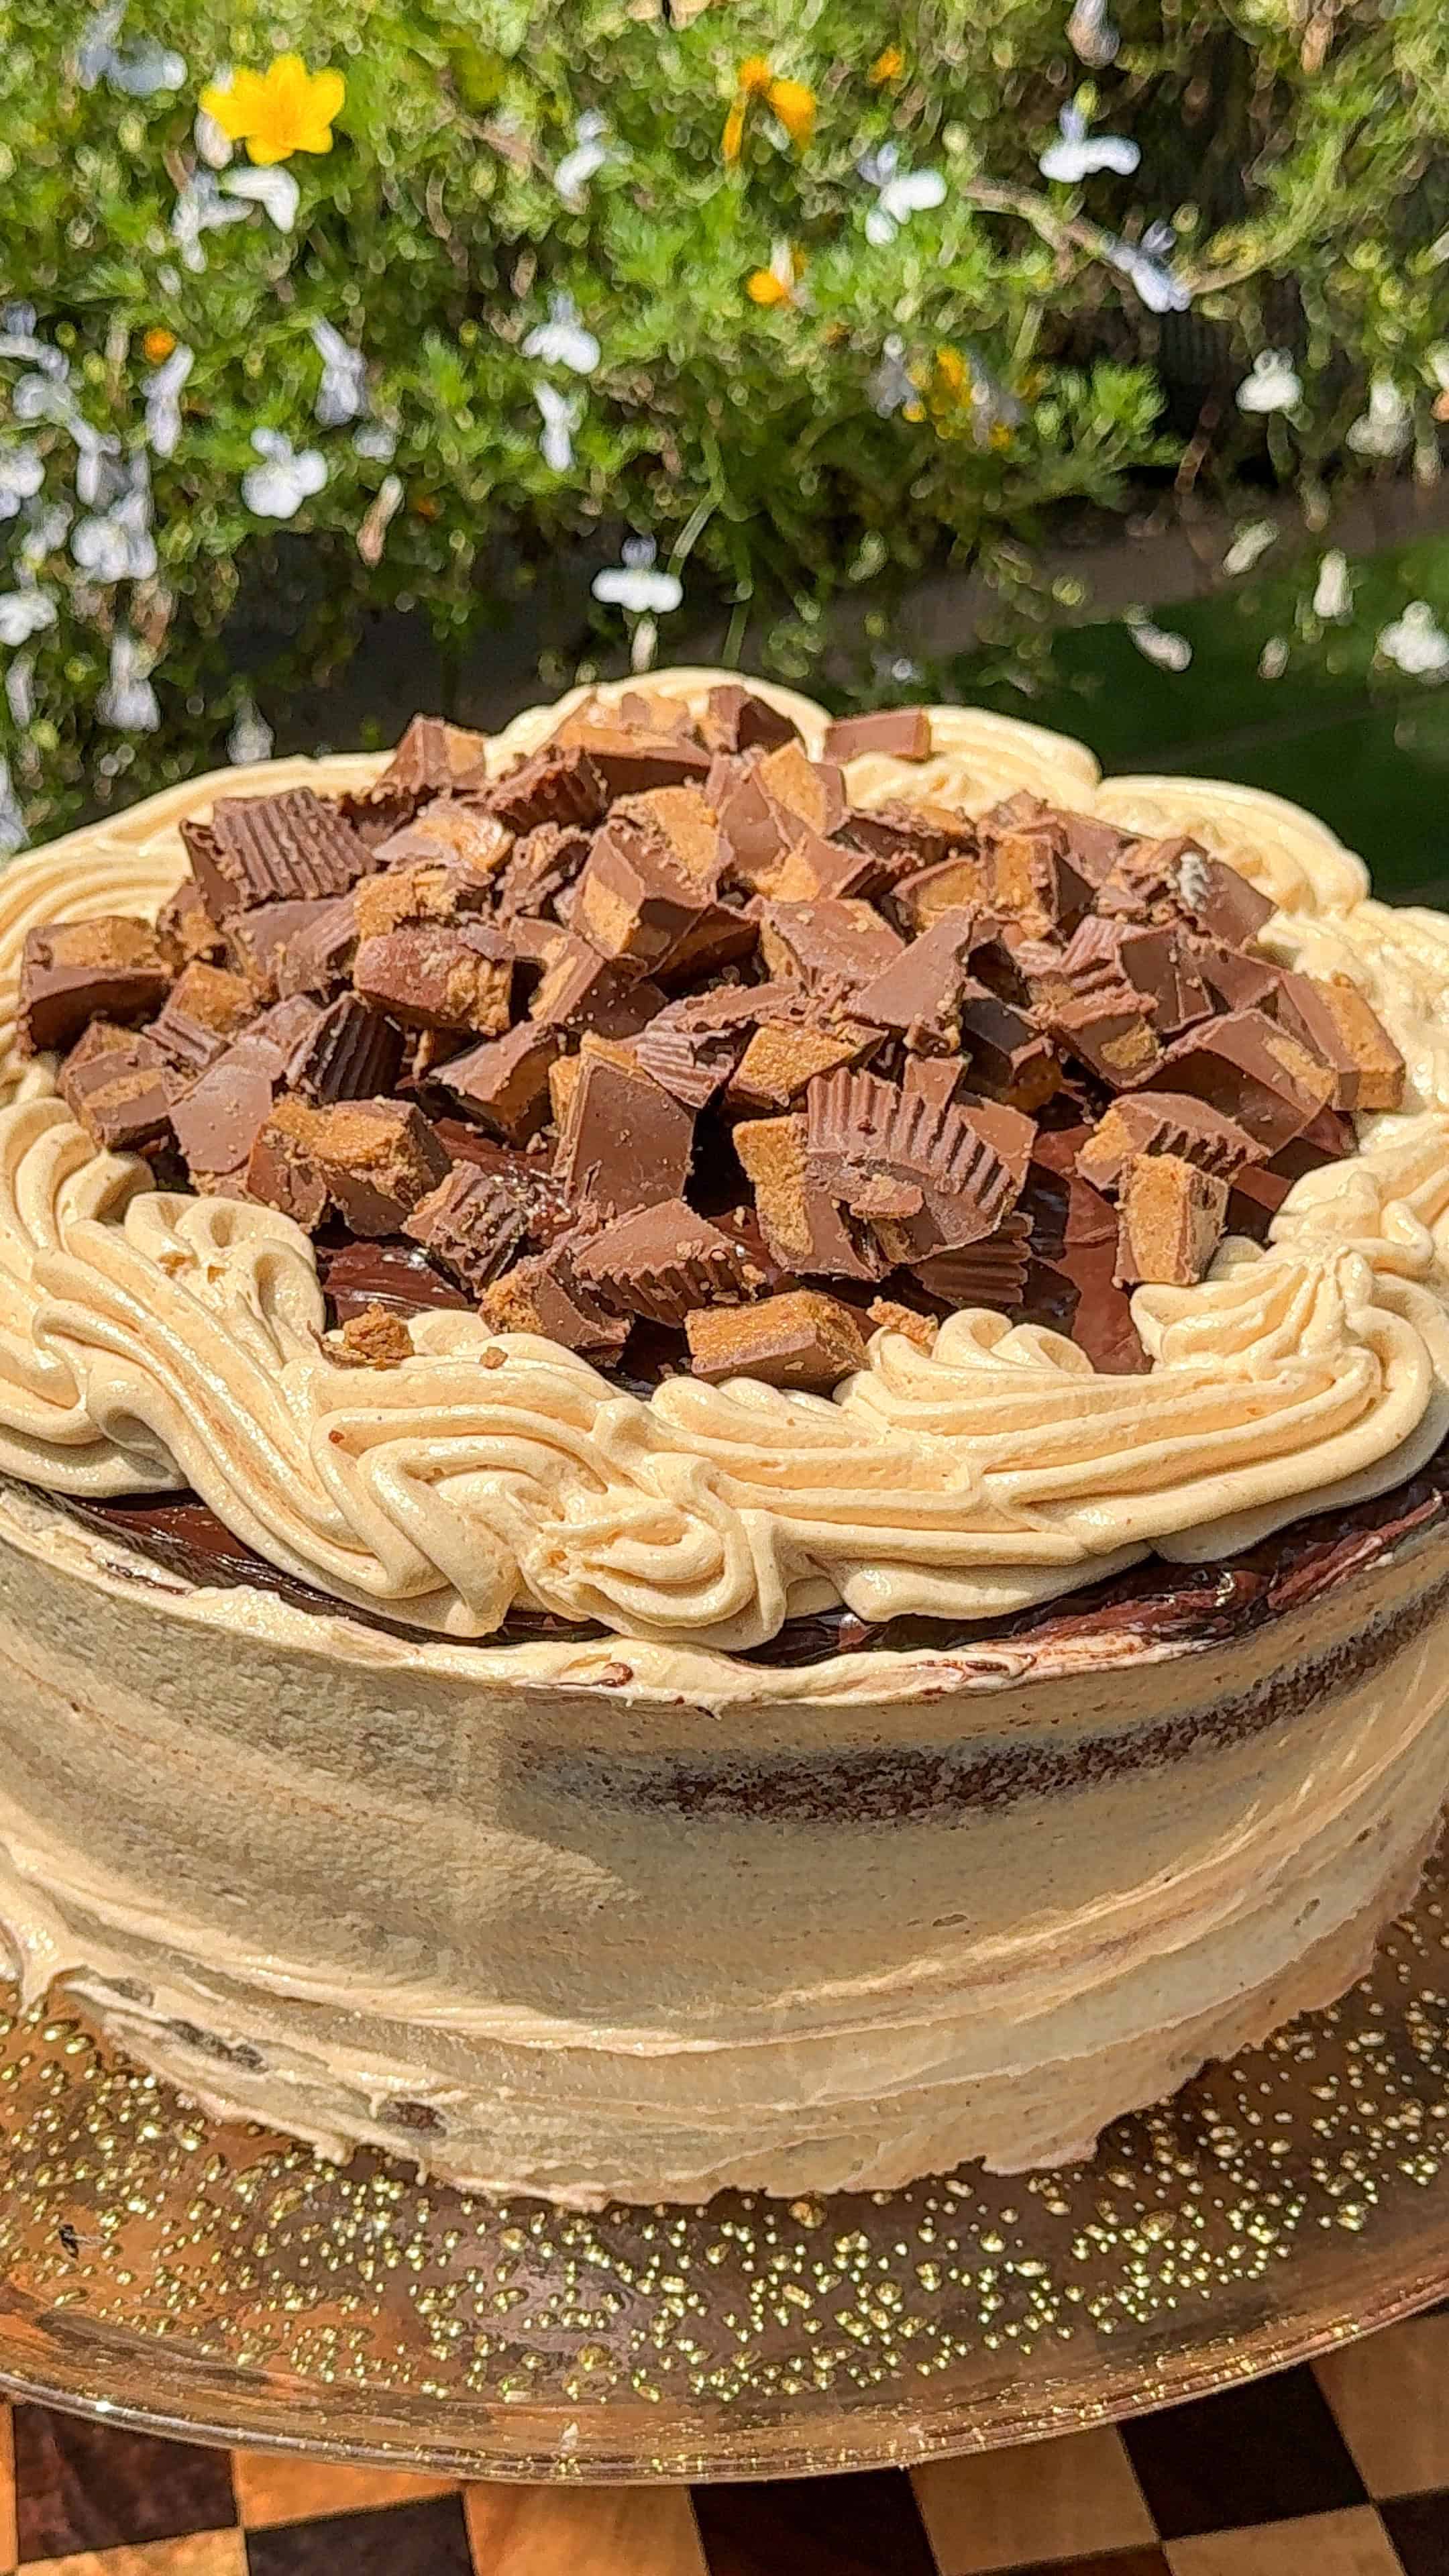
This cake is everything. We’re talking a moist, rich, deeply chocolatey cake (the hot coffee trick makes it SO fudgy and takes the chocolate flavor to a whole other level), layered up with a silky dark chocolate ganache and the dreamiest peanut butter cream cheese frosting, all loaded with a TON of chopped Reese’s cups. Every single bite has that perfect salty sweet peanut butter and chocolate thing going on, and it is pure magic.
If you have a peanut butter and chocolate person in your life (or if that person is YOU), this is the cake to make them feel completely spoiled. It looks like it came straight out of a fancy bakery, but I promise it comes together easier than you’d think. My mom was totally, completely OBSESSED, and I’m just saying, I think I secured the favorite kid title for at least another year. Not that it was ever really a competition. You can’t compete where you can’t compare!
P.S. Make your ganache FIRST so it has plenty of time to thicken up while you do everything else. You want it thick and spreadable, not runny, so give it time to cool down. A warm, runny ganache will slide right off your cake and make you sad, so a little patience here pays off BIG.
Ingredients Needed
- Cake Flour: This gives the cake that soft, tender, melt in your mouth crumb we’re after. It has a lower protein content than all purpose, so your cake bakes up extra delicate and fluffy. All purpose flour works perfectly here too if that’s what you have on hand, no worries at all. Just spoon and level it so your cake doesn’t turn out dense.
- Granulated Sugar and Brown Sugar: This dynamic duo sweetens the cake and keeps it unbelievably moist. The brown sugar adds a little extra richness and a soft, caramelly depth that plays SO well with the chocolate. Together they give you that perfect tender texture. Do not swap them all for one or the other, the combo is doing important work here.
- Dutch Pressed Cocoa Powder: This is what gives the cake its deep, dark, intensely chocolatey flavor and that gorgeous rich color. Dutch pressed is smoother and less acidic than natural cocoa, so it tastes luxurious and never bitter. It is truly the heart of this chocolate cake. Sift it if it looks lumpy so you don’t get any little pockets in your batter.
- Baking Powder: Our leavening that gives all three layers a beautiful, even rise. It keeps the cake light and fluffy instead of dense and heavy. Make sure yours is fresh for the best lift. Three teaspoons might sound like a lot, but this is a big batch of batter!
- Salt: Just a little to balance all that sweetness and make the chocolate flavor really POP. It keeps the cake from tasting flat or one note. A little goes a long way. Never skip your salt in a sweet recipe, friends!
- Whole Milk: This adds moisture and richness to the batter for a soft, tender crumb. The fat in whole milk really matters here, so try not to swap it for something lighter. It helps everything come together into that smooth, pourable batter. Room temperature milk blends in the most easily.
- Sour Cream: My secret weapon for the MOST moist, tender cake. It adds a little tang and a ton of richness, and it keeps the cake soft for days. Do not skip it, it genuinely makes all the difference. Full fat is the way to go here.
- Unsalted Butter, Melted: This brings richness and that lovely buttery flavor to the cake. Melting it means it blends right into the wet ingredients for a smooth batter. Unsalted lets you control exactly how much salt goes in. Let it cool slightly so it doesn’t cook your eggs when you mix everything together.
- Large Eggs: These bind everything together and give the cake structure and richness. Room temperature eggs blend in the smoothest, so let them sit out for a bit. They help create that soft, plush crumb we all love. Two large eggs is the perfect amount.
- Vanilla Extract: A splash of warmth and sweetness that rounds out all that deep chocolate flavor. It shows up in the frosting too, so keep the bottle handy. Use a good quality pure vanilla if you can. It ties every single layer of this cake together beautifully.
- Hot Strong Coffee: Do not skip this, and NO, your cake will not taste like coffee! The hot coffee blooms the cocoa and makes the chocolate flavor taste richer, deeper, and more intense. It also makes the batter very thin, which is exactly what we want for that fudgy, moist crumb. Trust me on this one, it’s the magic step.
- Dark Chocolate: This is the base of our silky, luxurious ganache. Chop it up nice and fine so it melts smoothly and evenly into the warm cream. Use a good quality chocolate you love the taste of, since it really shines here. It sets up into that glossy, spreadable layer that makes this cake so decadent.
- Heavy Cream: This does double duty in our ganache and in the frosting. Warmed and poured over the chopped chocolate, it melts everything into that smooth, pourable ganache. In the frosting, a splash loosens things up and makes it extra light and fluffy. Rich, dreamy, and absolutely essential.
- Peanut Butter: The star of our frosting and the whole reason we’re here! Use a smooth, classic no stir style (like Jif or Skippy) for the creamiest, most stable frosting. It brings that salty sweet peanut butter flavor that pairs so perfectly with all that chocolate. This is what makes the cake so ridiculously good.
- Cream Cheese: This adds a subtle tang and a silky, dreamy texture to the peanut butter frosting. Use a full fat block, not the tub or spreadable kind, and make sure it’s softened so it whips up smooth. It keeps the frosting from being too sweet and balances everything beautifully. Truly the perfect partner for the peanut butter.
- Room Temperature Butter: The base of our light, fluffy frosting, so make sure it’s properly softened before you start. Beating it up creates that gorgeous whipped texture we want for piping. Room temp is truly key, so pull it out an hour or two ahead. Cold butter just will not cream up the same way.
- Powdered Sugar: This sweetens and thickens the frosting to your perfect pipeable consistency. Add it in slowly so you can control exactly how thick and sweet it gets. It dissolves smoothly for a silky, lump free frosting every time. This is what helps those pretty swirls hold their shape on top.
- Reese’s Cups: The show stopping finish! You’ll chop up a whole pile of these and fold a generous layer between each tier, then sprinkle even more on top to garnish. They add the BEST little pockets of peanut butter cup goodness in every bite. Do not be shy here, we want a TON.
Substitutions and Modifications
- No cake flour? All purpose flour works perfectly, just spoon and level it. For an even more tender crumb, remove 2 tablespoons of flour per cup and replace with cornstarch.
- Use whatever chocolate you love for the ganache. Semisweet works great if you like it a touch sweeter, or go extra dark if you want it more intense.
- No hot coffee on hand? Use the same amount of hot water. The coffee just deepens the chocolate flavor, so your cake will still be delicious.
- Swap the smooth peanut butter for crunchy if you love a little texture in your frosting.
- Out of sour cream? Full fat plain Greek yogurt is a perfect one to one swap for that same moisture and tang.
- Feel free to use your favorite chopped peanut butter cups or even a mix of Reese’s and chopped peanuts for the garnish.
Why You’ll Love This Recipe
- It’s the ULTIMATE peanut butter and chocolate lover’s dream, with a moist fudgy cake, silky ganache, and dreamy peanut butter frosting all in one.
- The hot coffee trick makes the chocolate cake unbelievably rich, moist, and deeply chocolatey (with zero coffee taste, I promise!).
- It’s a total show stopper loaded with a TON of chopped Reese’s cups, so it’s PERFECT for birthdays and any celebration that calls for something extra special.
Equipment Needed
- Three 9 inch round cake pans
- Stand mixer (or a hand mixer and a big bowl)
- Large mixing bowls
- Whisk
- Large measuring cup or bowl for wet ingredients
- Small saucepan
- Microwave safe bowl
- Rubber spatula
- Offset spatula
- Piping bag and tip
- Wire cooling racks
Triple Layer Peanut Butter Chocolate Cake with Reese’s
Ingredients
For the Chocolate Cake:
- 2 cups cake flour or all purpose flour
- 1 cup granulated sugar
- 1 cup brown sugar
- ¾ cup Dutch pressed cocoa powder
- 3 teaspoons baking powder
- 1 teaspoon salt
- 1 cup whole milk
- ½ cup sour cream
- ½ cup unsalted butter melted
- 2 large eggs
- 1 tablespoon vanilla extract
- 1 cup hot strong coffee
For the Dark Chocolate Ganache:
- 10 oz dark chocolate chopped
- 10 oz heavy cream
For the Peanut Butter Cream Cheese Frosting:
- 1 cup unsalted butter room temperature
- 8 oz cream cheese room temperature
- 1 ¼ cups peanut butter
- 3 cups powdered sugar
- 1 teaspoon vanilla extract
- ¼ cup heavy cream
For the Chocolate Simple Syrup:
- ¼ cup water
- ¼ cup granulated sugar
- 1 tablespoon cocoa powder
For Assembly:
- 20 Reese’s cups chopped
Instructions
- Preheat your oven to 350 degrees F and grease three 9 inch cake pans really well so your layers release nice and easy.
- In a large bowl, whisk together your cake flour, granulated sugar, brown sugar, cocoa powder, baking powder, and salt until everything is evenly combined.
- In a separate large bowl or big measuring cup, whisk together the whole milk, sour cream, melted butter, eggs, and vanilla until it’s fully combined and smooth.
- Fold the wet ingredients into your dry ingredients until just combined, then pour in the hot coffee and stir it in. Your batter is going to be VERY thin, and I promise that is exactly what we want for a moist, fudgy cake!
- Divide the batter evenly between your three greased pans and bake at 350 degrees F for 20 to 22 minutes, or until a toothpick inserted in the center comes out clean.
- Let the cakes cool in the pans for about 10 minutes, then carefully turn them out onto wire racks and let them cool COMPLETELY, about 50 minutes. Do not rush this, warm cake plus frosting equals a melty mess!
- While the cakes cool, make your ganache. Chop your dark chocolate and pop it in a bowl. Microwave your heavy cream in 20 second increments until it’s warm, then pour it right over the chocolate. Let it sit untouched for 3 minutes, then stir it all together until smooth and glossy. Set it aside to thicken up, this is the part you want to give plenty of time!
- Now make your frosting. Beat the peanut butter, cream cheese, and butter together until it’s light, fluffy, and fully combined. Add in the heavy cream and vanilla and mix again, then slowly add your powdered sugar until you reach that perfect pipeable consistency. Set aside.
- Make your chocolate simple syrup. In a small saucepan, stir together the water, granulated sugar, and cocoa powder. Let it simmer for 5 to 10 minutes, then set it aside to cool. This keeps every layer extra moist and delicious!
- Time to assemble! Chop up your 20 Reese’s cups. Place your first cake layer down and brush it generously with the chocolate simple syrup. Add a layer of peanut butter frosting, then a layer of ganache, then about one third of your chopped Reese’s. Repeat this two more times with your remaining layers, using one third of the frosting, ganache, and Reese’s each time.
- Do a light crumb coat of the peanut butter frosting around the edges of the cake, then spread the ganache over the top. Swirl the remaining peanut butter frosting into a pretty design on top, and finish with a big sprinkle of chopped Reese’s cups to garnish. And that is IT, the most perfect decadent cake ever!
Storage Instructions
- Counter: This cake will keep at room temperature in an airtight container or cake dome for up to 2 days. Because of the cream cheese frosting, it’s best kept somewhere cool and not in a warm kitchen.
- Fridge: Store the cake in an airtight container in the fridge for up to 5 days. Let slices sit at room temperature for about 20 to 30 minutes before serving so the cake softens back up and tastes its best.
- Freezer: Wrap slices or whole layers well and freeze for up to 3 months. Thaw overnight in the fridge, then bring to room temperature before serving.
Tips and Tricks
- Make your ganache FIRST so it has plenty of time to cool and thicken to a spreadable consistency while you do everything else.
- Make sure your cake layers are COMPLETELY cool before you start assembling, or your frosting and ganache will slide right off.
- Do not skip the hot coffee! It deepens the chocolate flavor and makes the cake incredibly moist, with zero coffee taste.
- Brush every layer with the chocolate simple syrup for a cake that stays unbelievably moist for days.
Frequently Asked Questions
Will this cake taste like coffee?
Not at all, I promise! The hot coffee is there to bloom the cocoa and make the chocolate flavor taste richer and deeper. You won’t taste coffee one bit, just pure, intense chocolate.
Can I use all purpose flour instead of cake flour?
Absolutely! All purpose flour works great here. For an even more tender crumb, you can remove 2 tablespoons of flour per cup and replace it with cornstarch, but it’s totally optional.
What kind of peanut butter works best?
A smooth, classic no stir peanut butter like Jif or Skippy gives you the creamiest, most stable frosting. Natural drippy peanut butters can make the frosting too soft, so I’d stick with the regular kind here.
My ganache is too runny, what do I do?
No worries at all! It just needs more time to cool and set up. Let it sit at room temperature until it thickens to a spreadable consistency, or pop it in the fridge for a few minutes, stirring occasionally.
Can I make this cake ahead of time?
Yes! You can bake the cake layers a day ahead and wrap them well once cooled. You can also make the frosting and ganache ahead, then bring everything to a workable temperature and assemble the day you plan to serve.
How many people does this cake serve?
This is a big, tall, decadent cake, so it serves about 15 people. Because it’s so rich, a little slice goes a long way!
Do you LOVE Peanut Butter & Chocolate?! Check Out MORE of my Favs:
Reese Chocolate Peanut Butter Cup Cookies
Brown Butter Peanut Butter Chocolate Chip Banana Bread
Let’s Stay in Touch!
If you make this Triple Layer Peanut Butter Chocolate Cake, I NEED to see it! Snap a photo of your gorgeous, Reese’s loaded masterpiece and tag me @munchiesbymallory on Instagram and TikTok. It seriously makes my whole entire day to see your bakes. This one is pure decadence and perfect for every birthday and celebration, so go treat someone you love (or yourself, you deserve it!). Happy baking, friends!





Leave a Reply